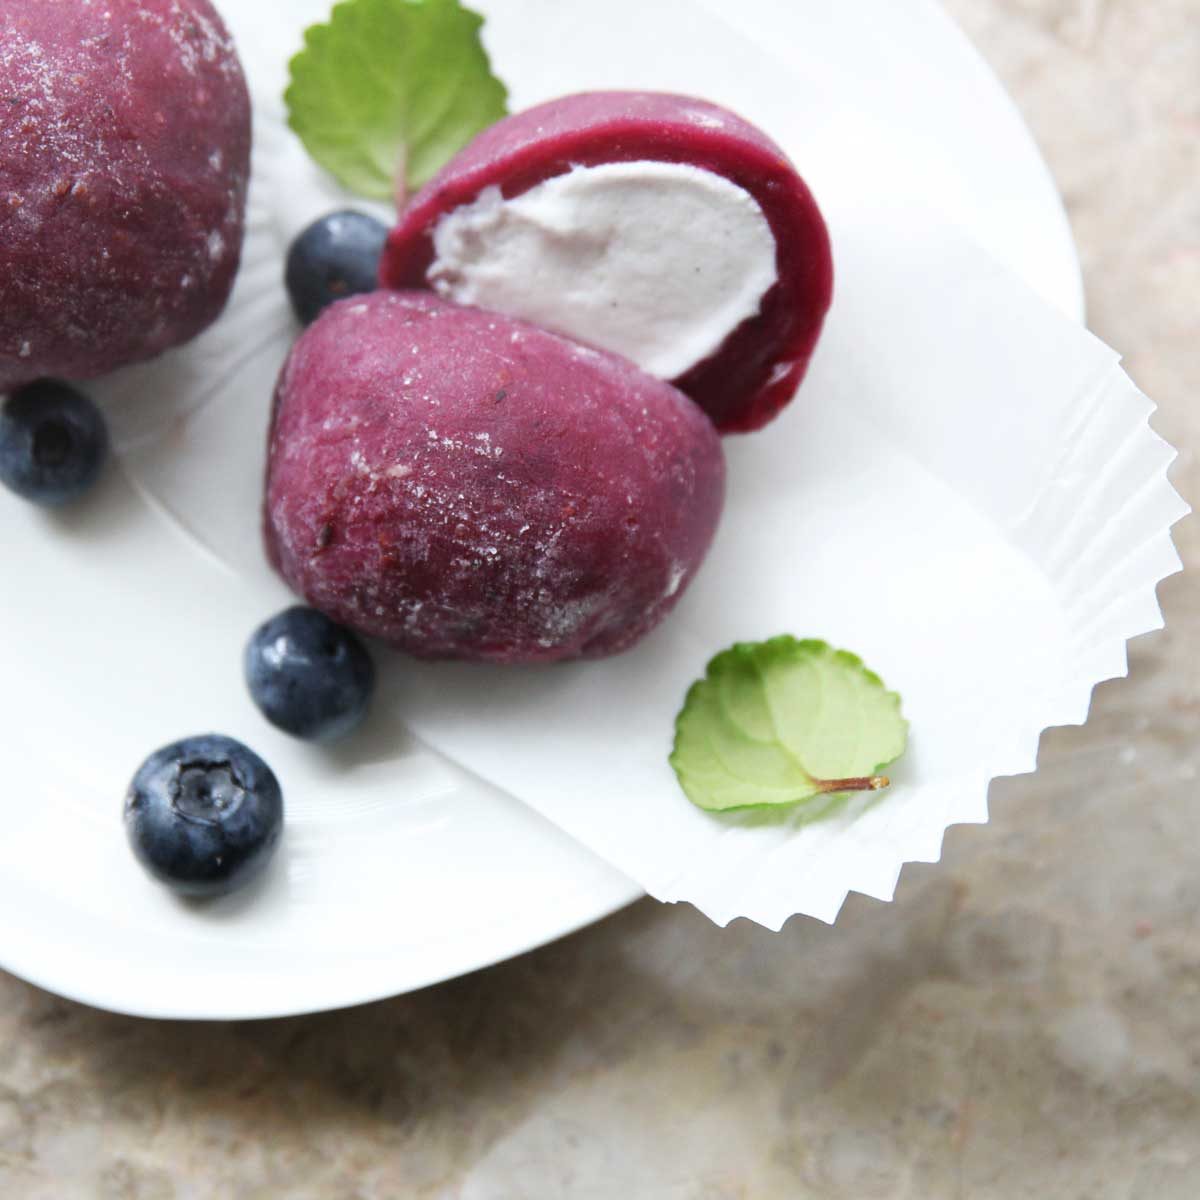
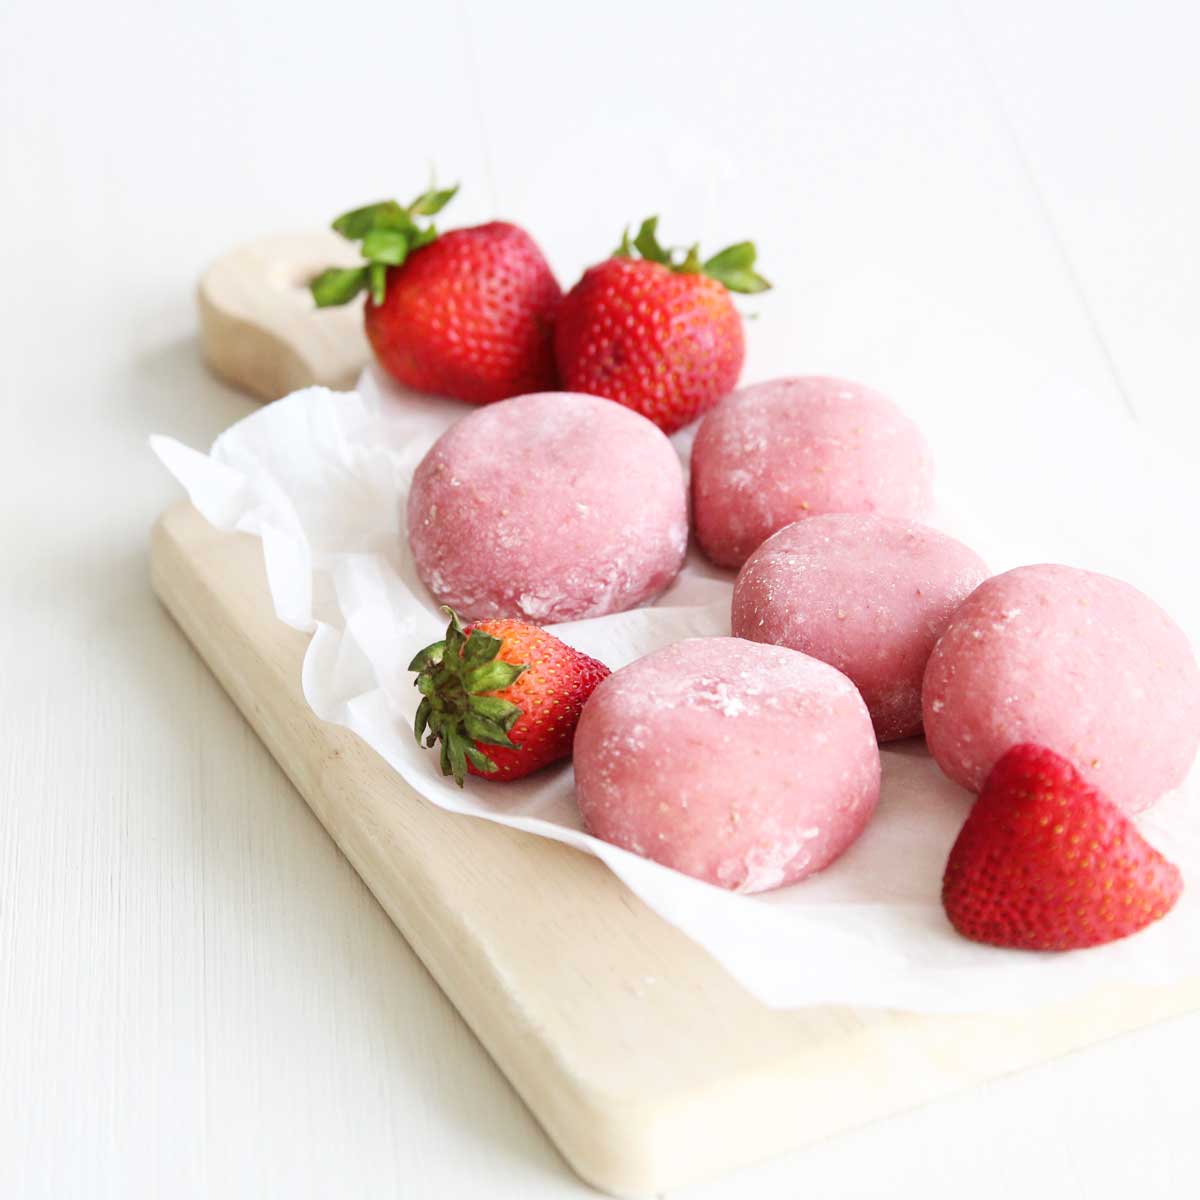
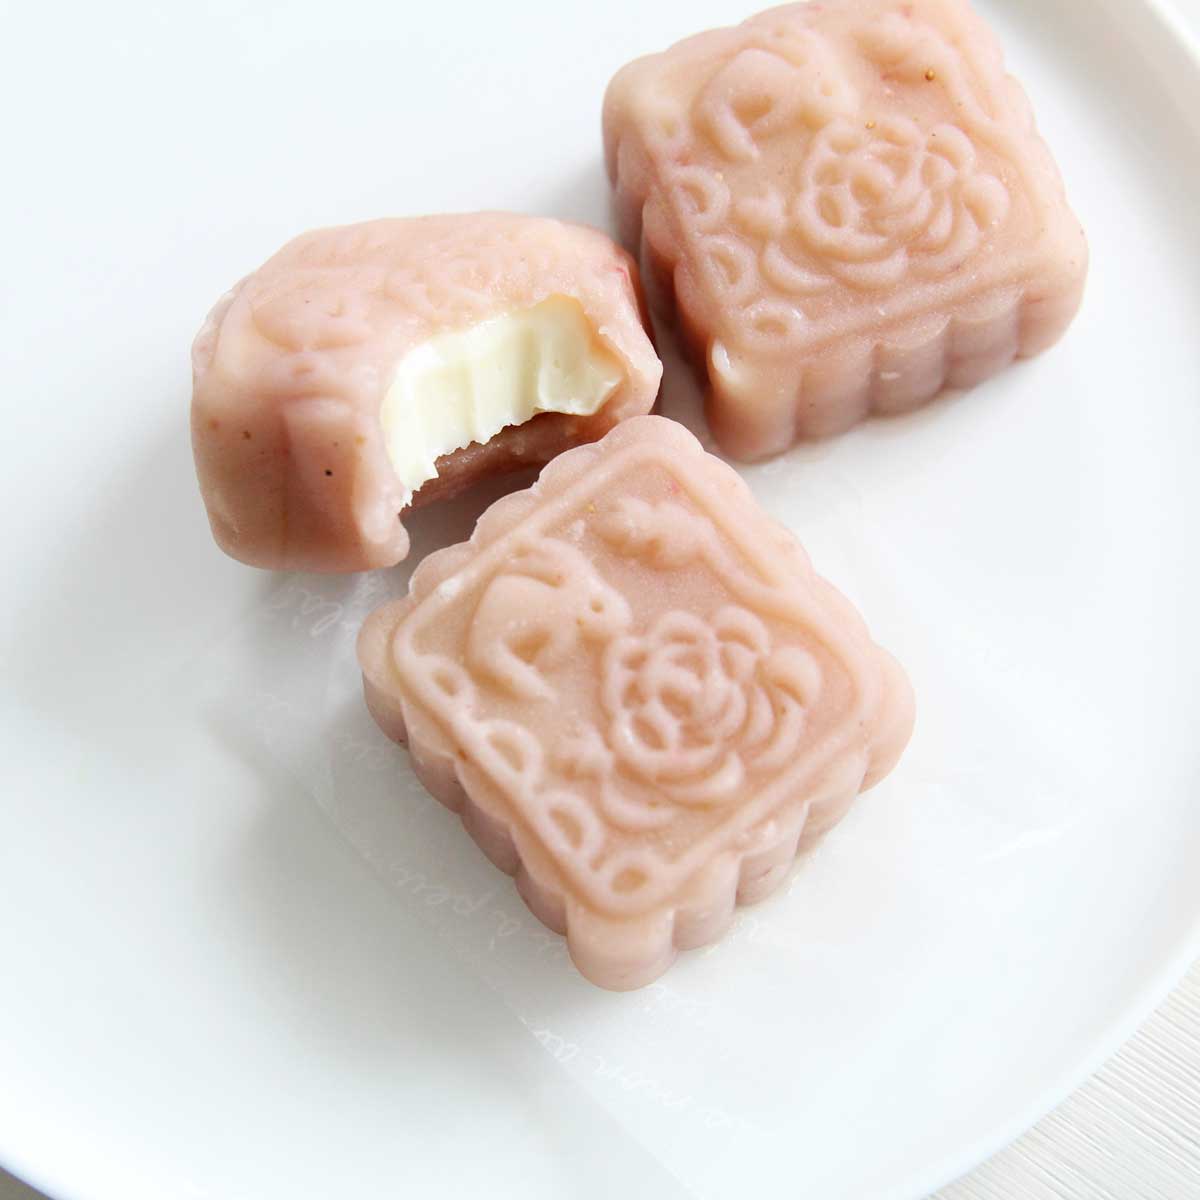
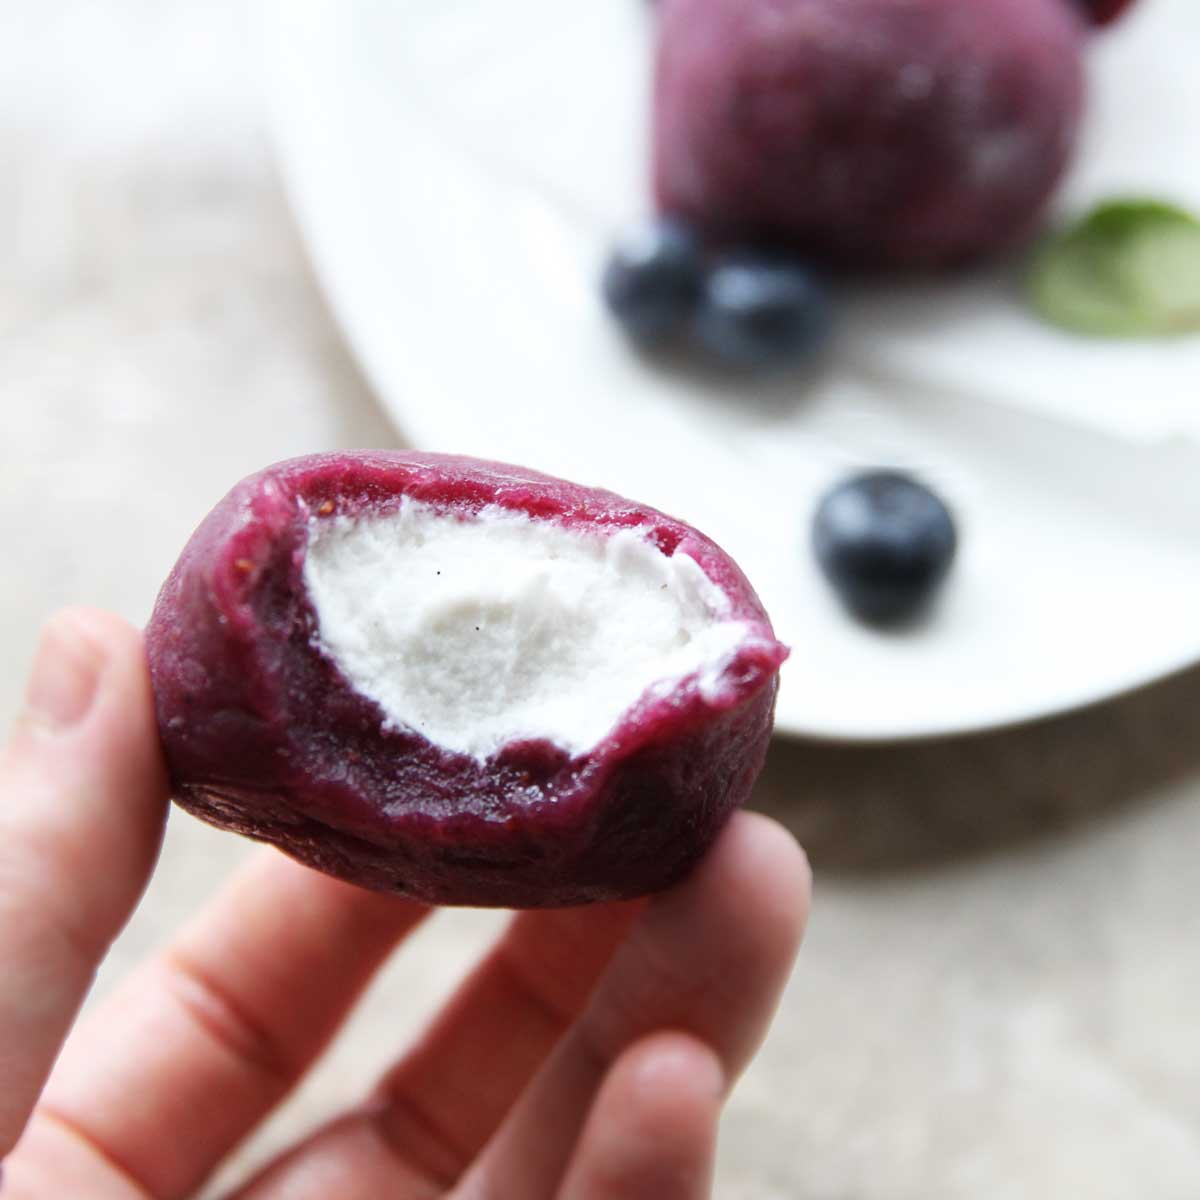
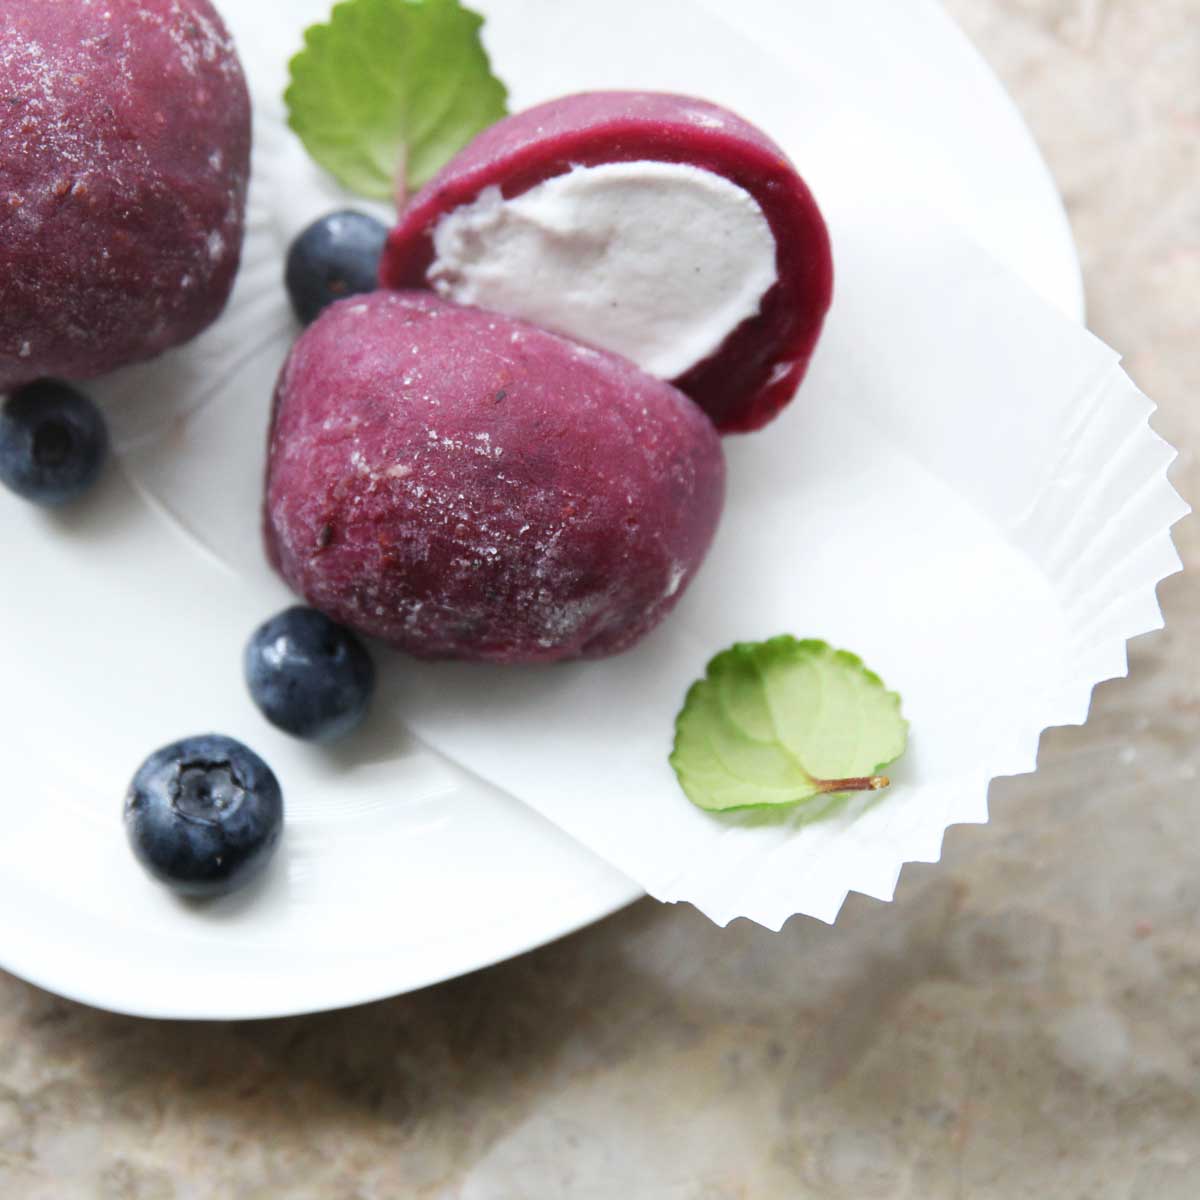
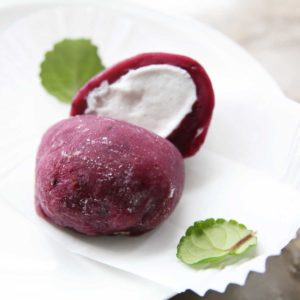
Here's the most gorgeous blueberry mochi ice cream recipe that's bursting with our favorite summer flavor and made using fresh ripe blueberries and filled with vegan ice cream. The outer mochi only takes about 10 minutes to make, since it's prepped in the microwave. Once that's done all you need is ice cream or frozen yogurt filling of choice. It's an instant family favorite.
Here's why I love this recipe
- no-bake
- gluten-free
- vegan
- easy to prepare (all in the microwave)
- only 5 ingredients
- made from fresh blueberries
- great source of vitamins and antioxidants
- actually healthy!
Ingredients Used to Make Vegan Blueberry Mochi Ice Cream
**I've linked some of these ingredients to amazon.com to give you an idea of what they are, but you should also be able to find them in your local grocery store (usually, the natural & organic food section). They are also affiliate links, which means that I earn a commission as an Amazon Associate if you decide to purchase the items. The price will be the same for you, link or no link 🙂
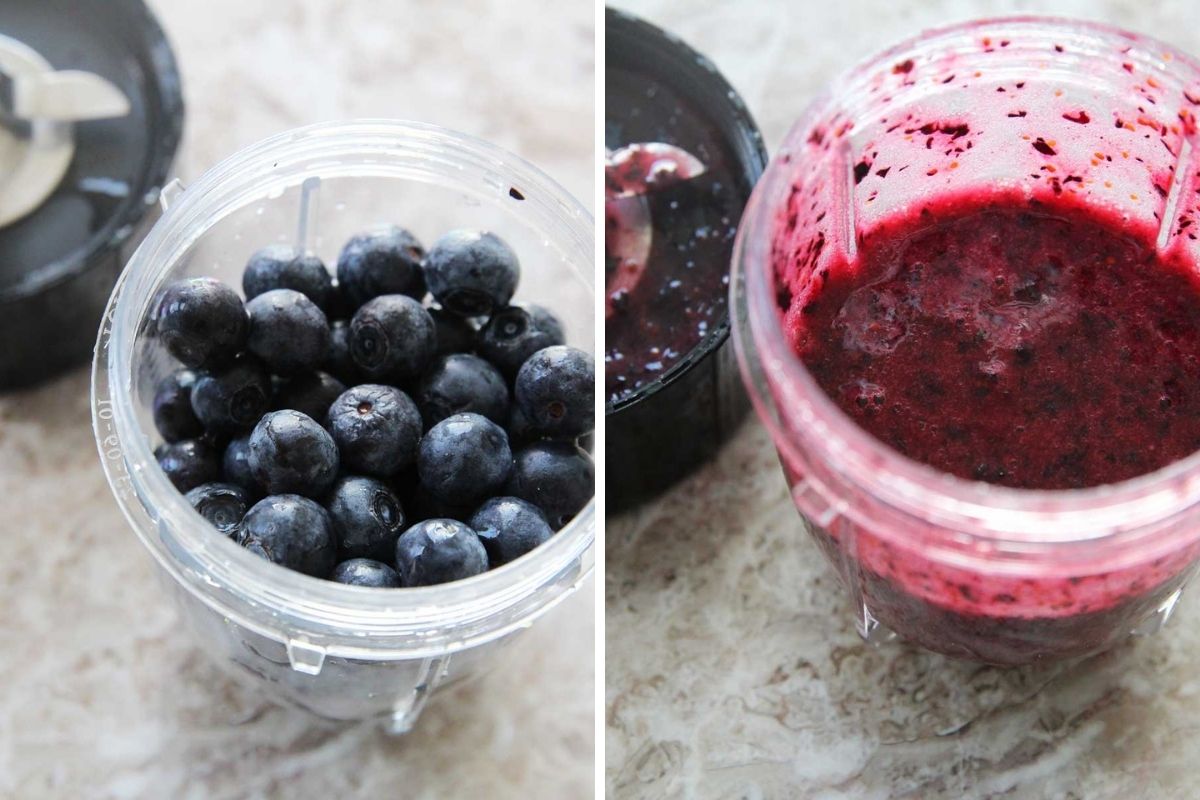
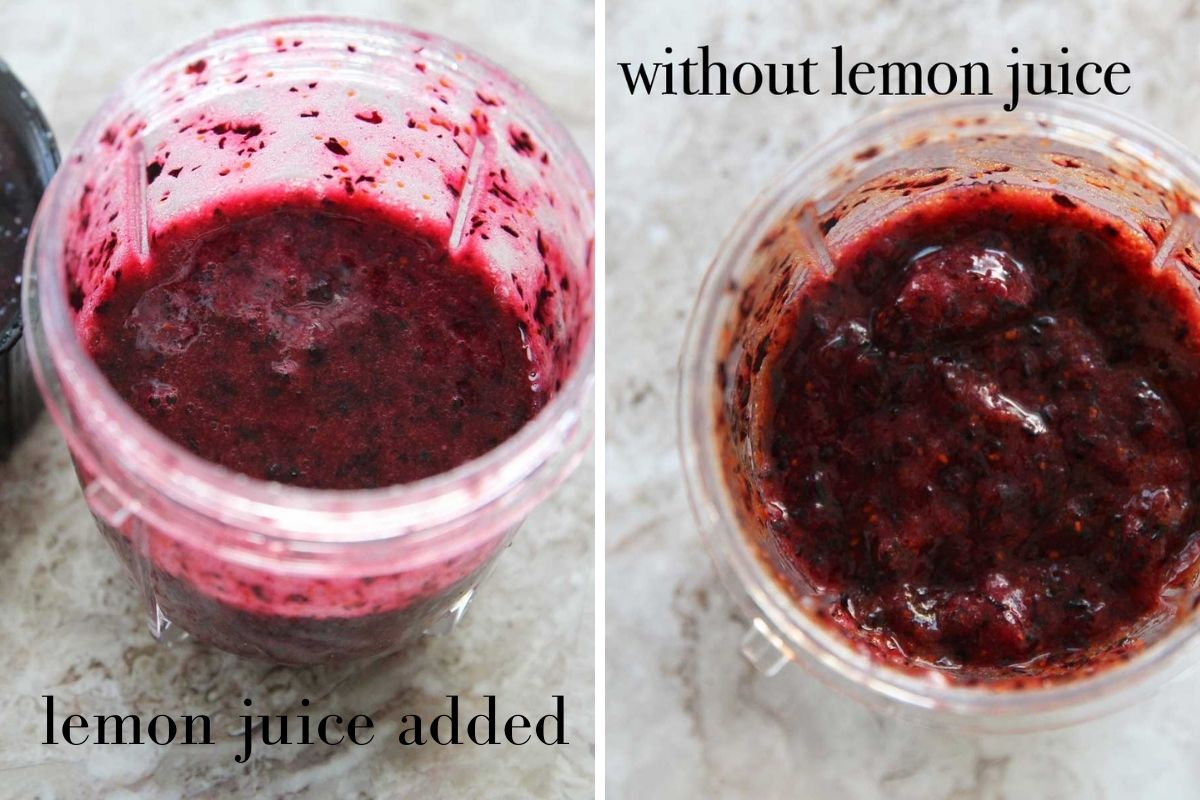
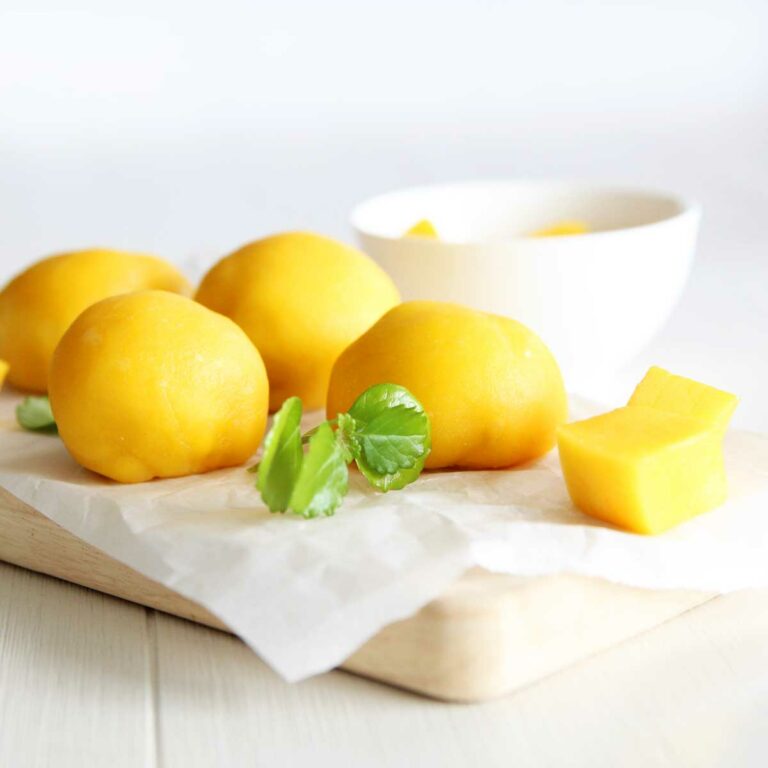
Blueberry - use fresh, or thawed from frozen. I used a mini blender to puree the blueberries, and added a bit of lemon juice to preserve the color.
- Glutinous Rice Flour - this goes by many names. You'll see Glutinous Rice Flour and Mochiko Flour (my favorite brand) in Asian grocery stores, and Sweet White Rice Flour in most other stores. ***Please note that regular white rice flour or brown rice flour is NOT the same thing as glutinous rice flour!!!

Cornstarch - for dusting the mochi
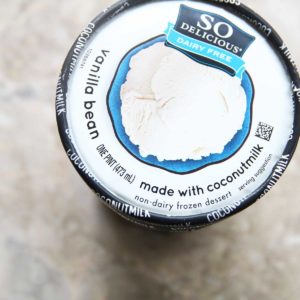
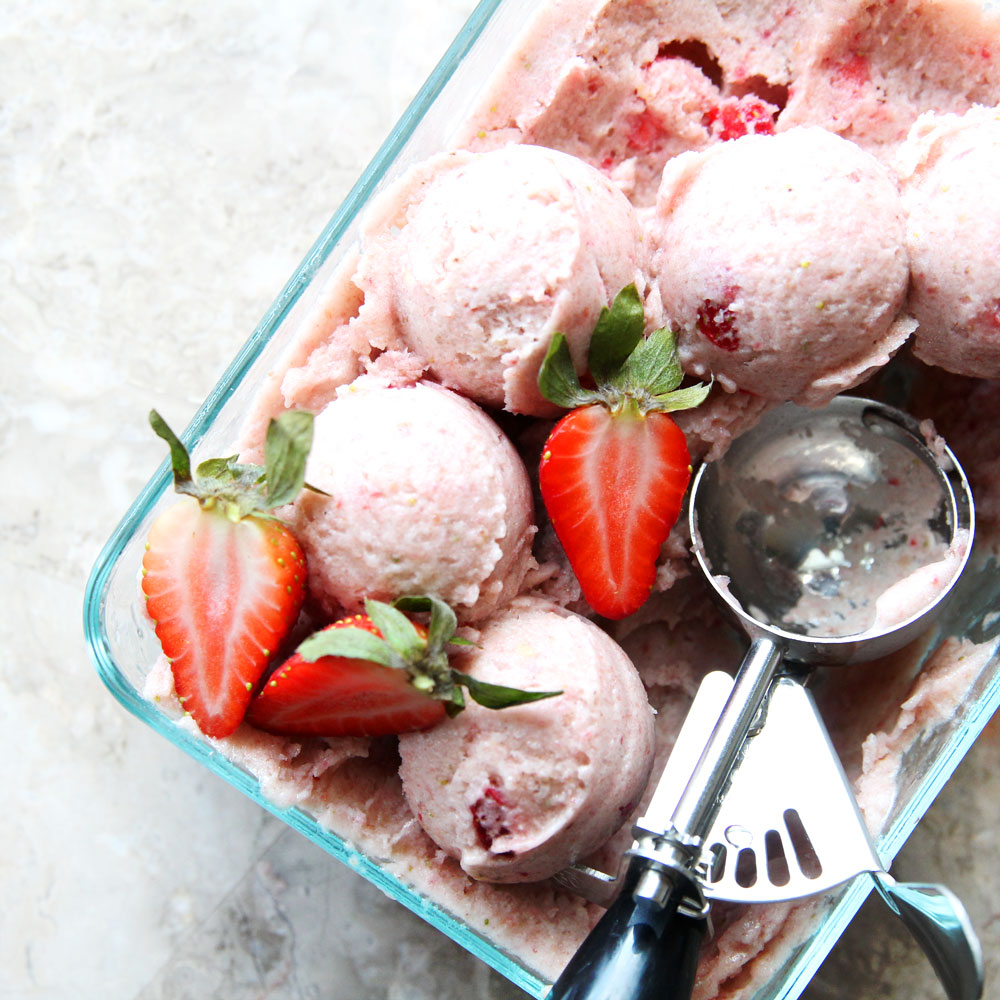
Ice cream filling - dairy or dairy free, any flavor you like. I used a vegan/ dairy free kind made from coconut milk, below:
More Blueberry Recipes (HERE)


How to Make
How to Make Vegan Blueberry Mochi Ice Cream
STEP 1
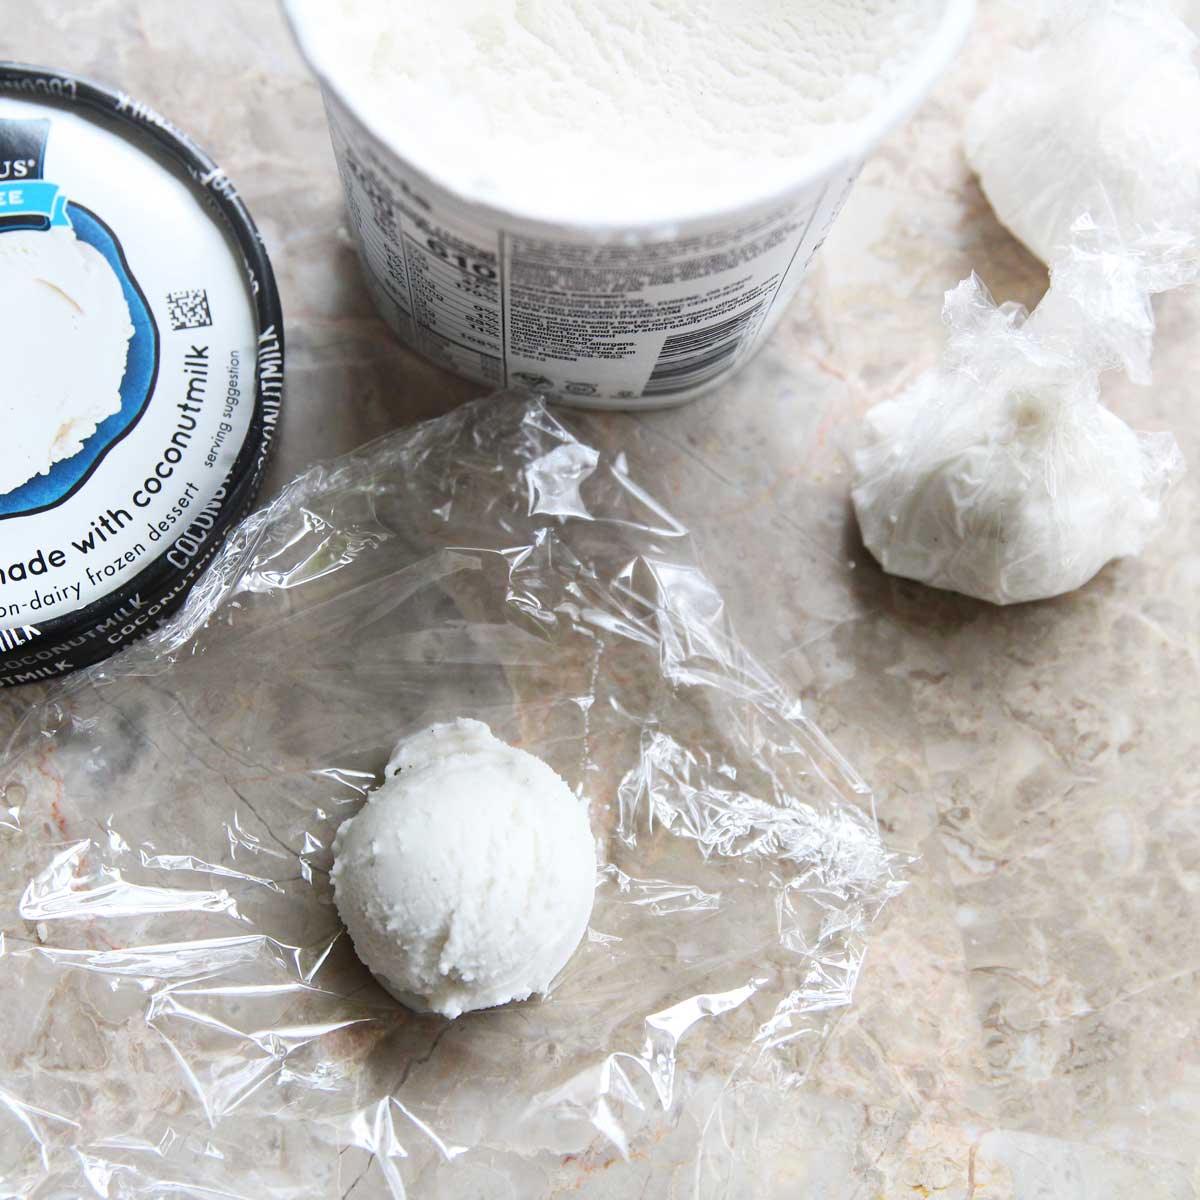
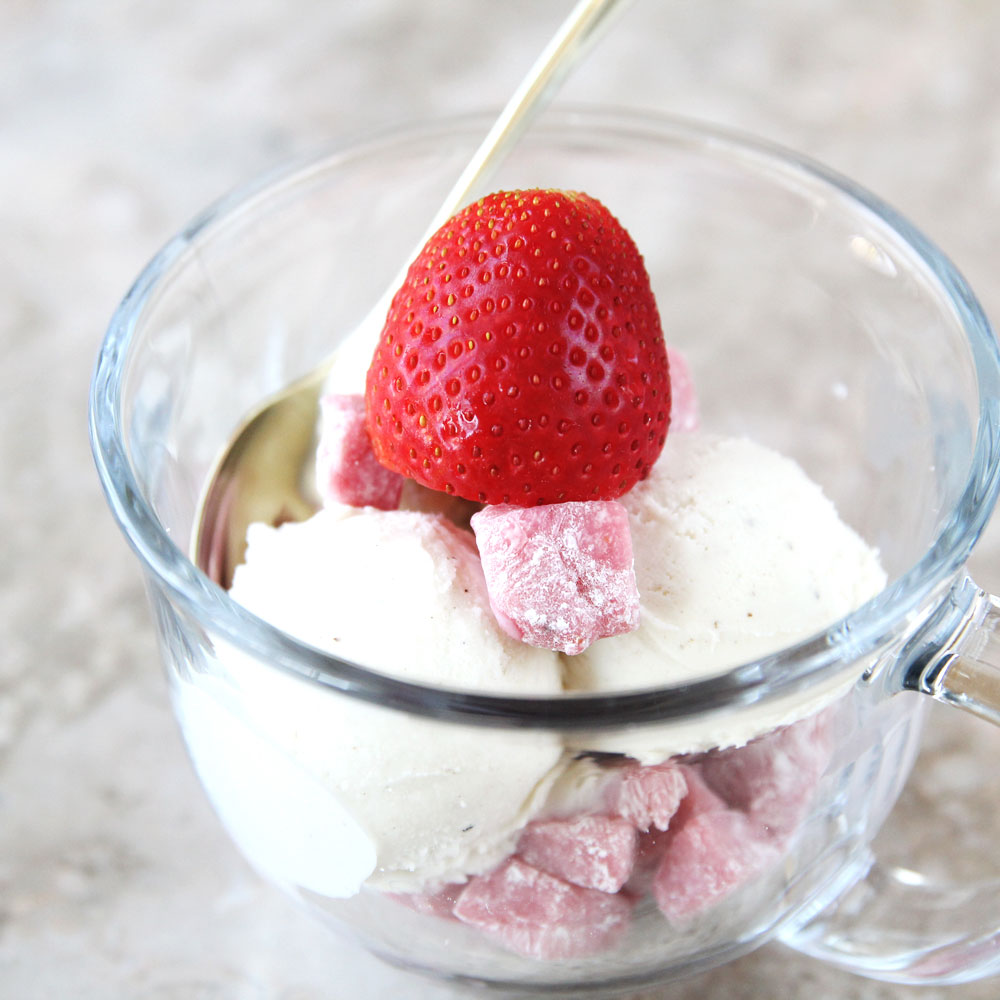
Prepare ice cream filling: place a scoop of ice cream into a piece of plastic clear wrap
STEP 2
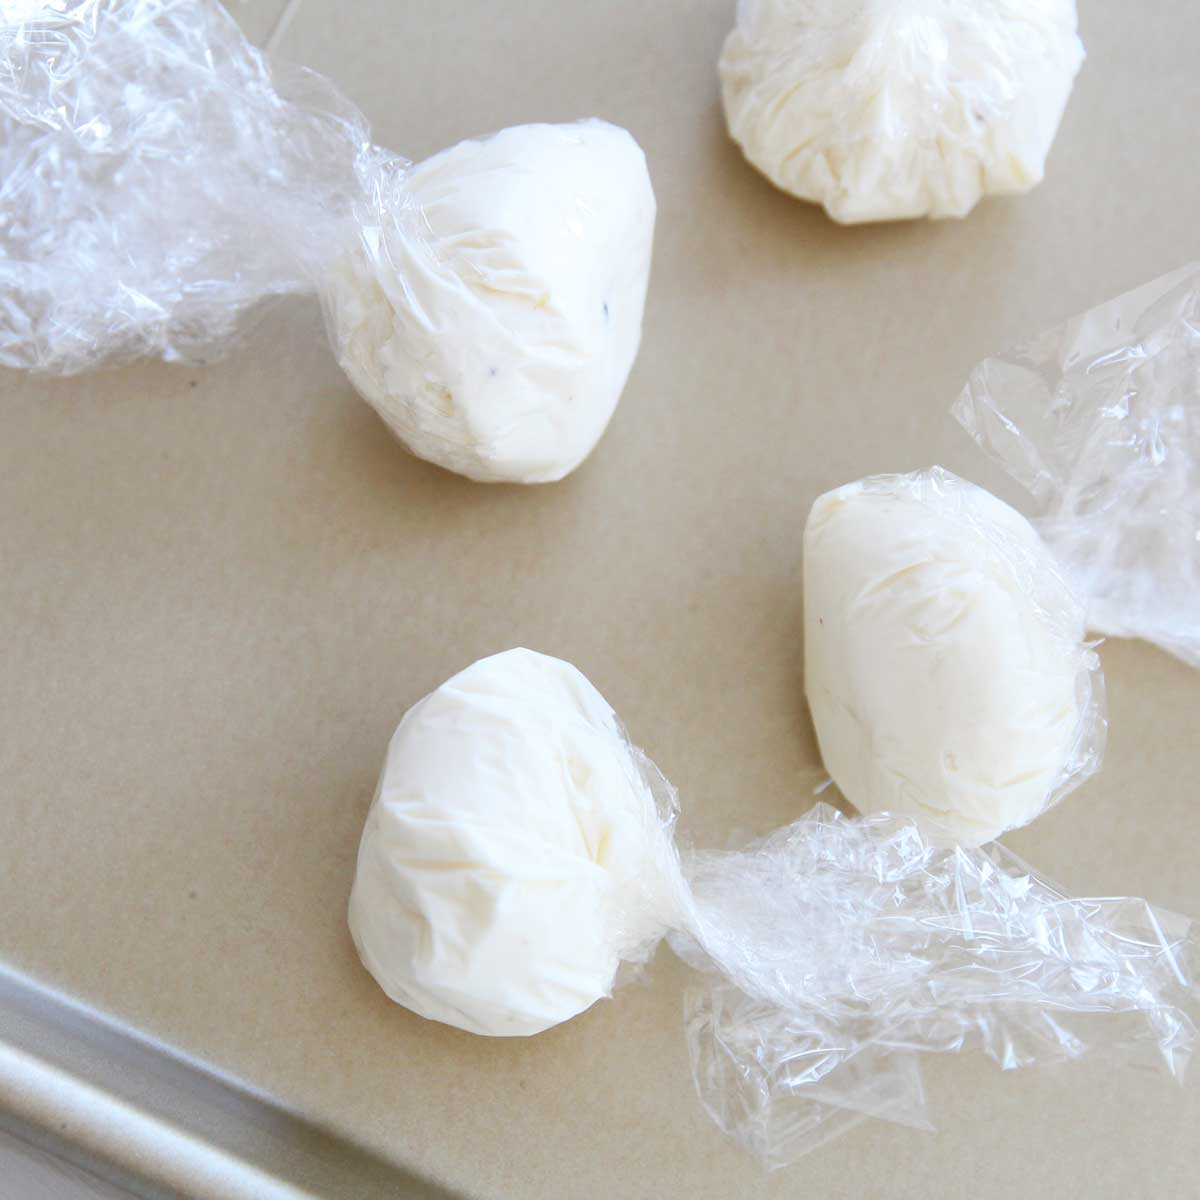
wrap the ice cream scoop with the plastic wrap, and freeze the pre-scooped ice cream until ready to use
STEP 3
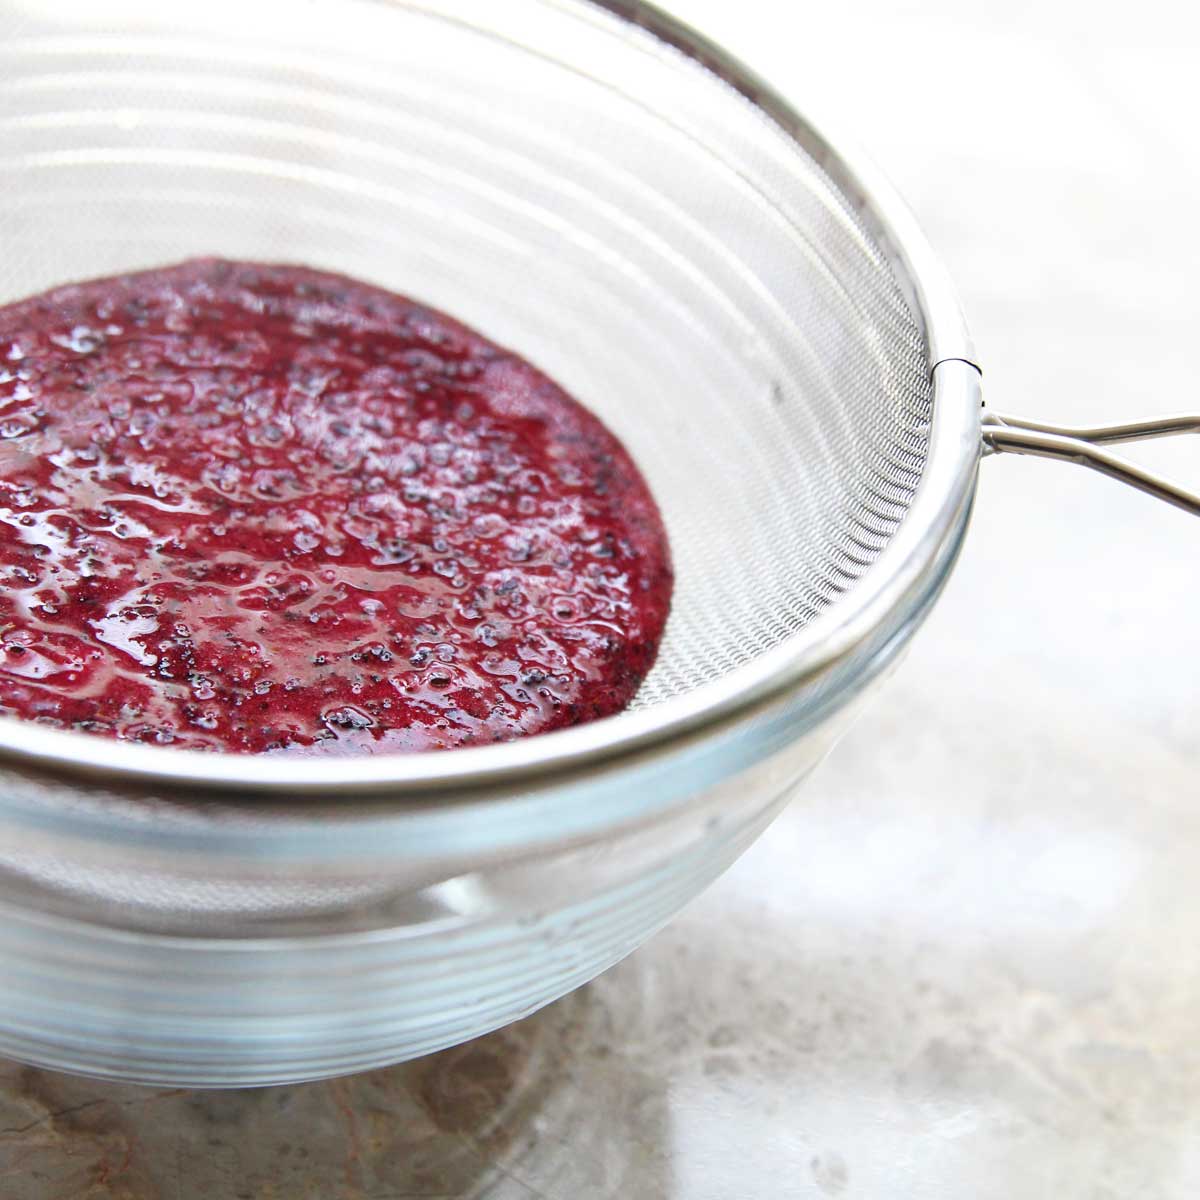
(OPTIONAL) strain the blueberry puree through a sieve to filter out the larger pieces of blueberry skin and seeds.
STEP 4
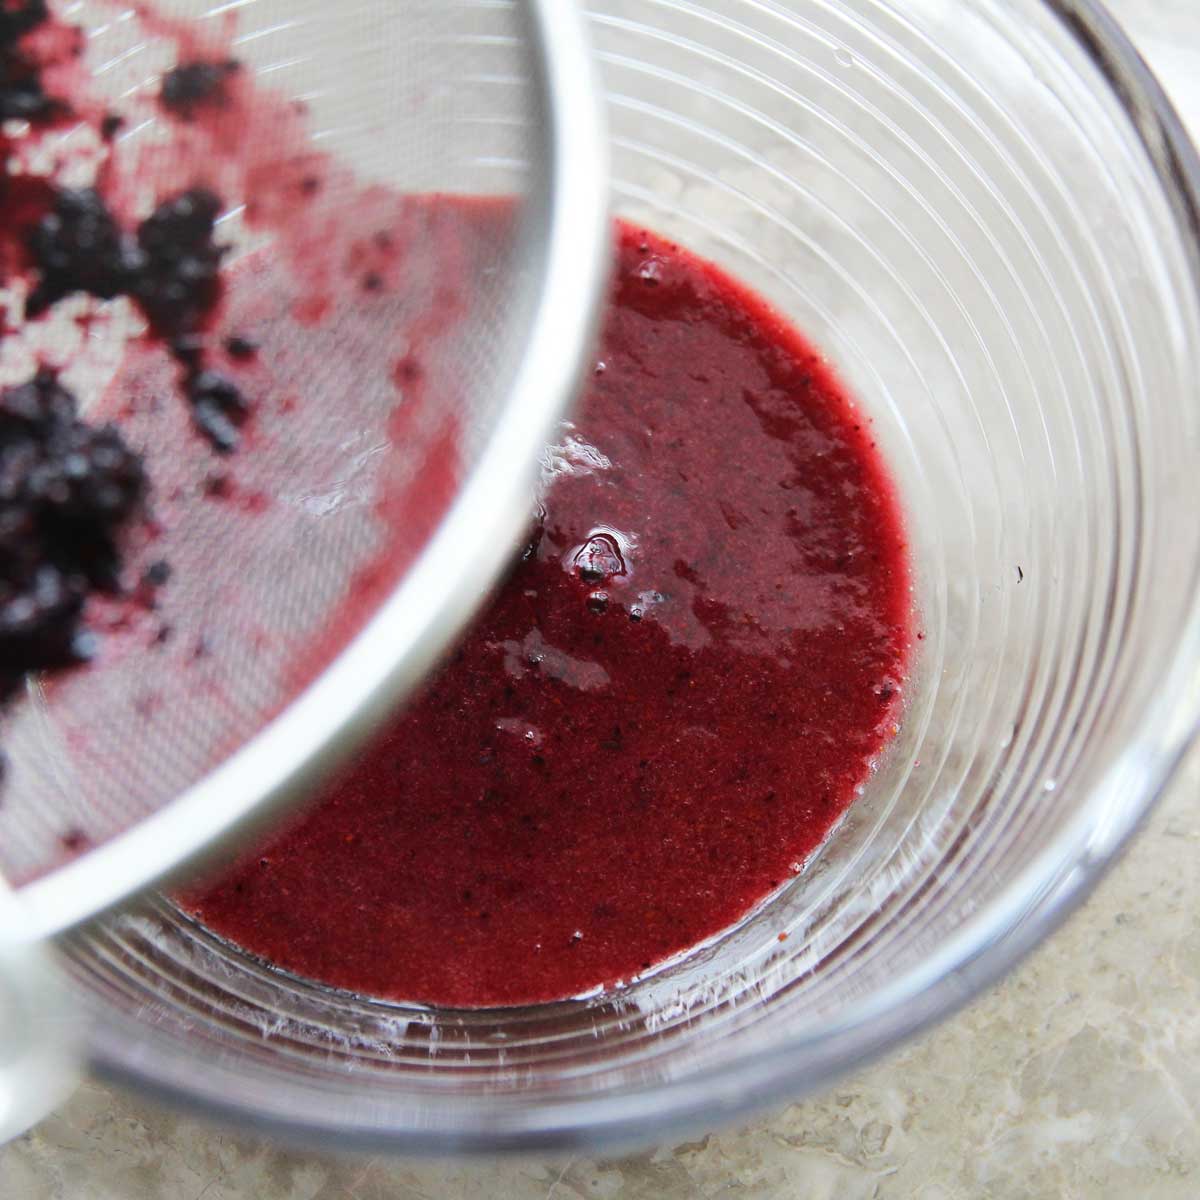
This filtering process ensures the smoothest mochi texture, but you're welcome to skip this step since it's much easier to just use the blueberry puree as is. The texture will be slightly rougher, but you'll be getting more nutrients and antioxidants that is present in the skin of the blueberries.
STEP 5
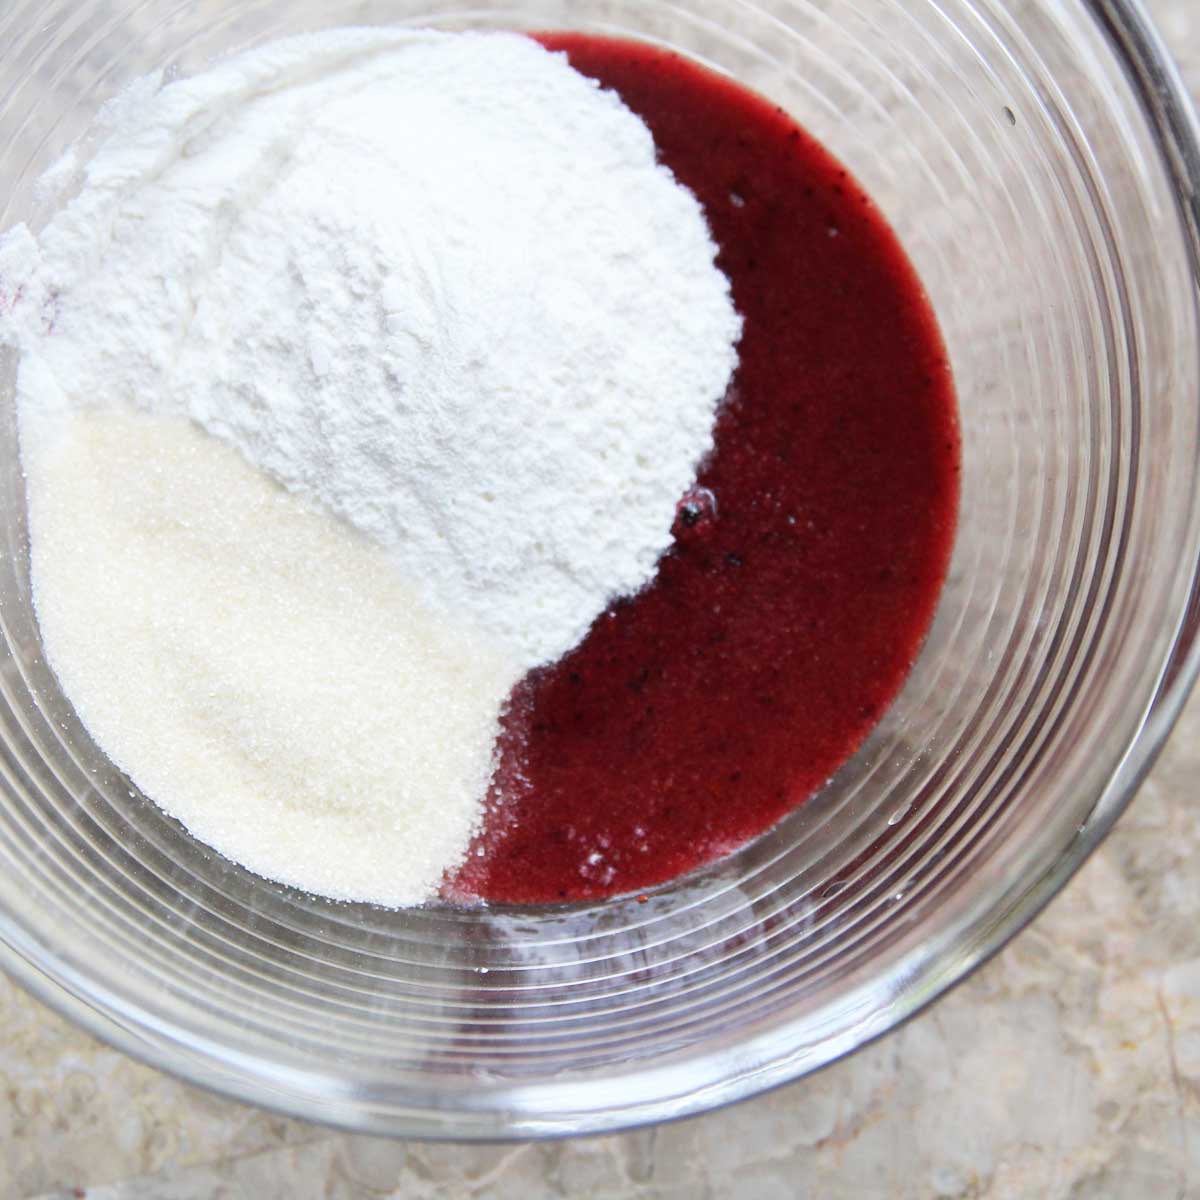
In a microwave-safe bowl (preferably glass, like pyrex), mix the sweet rice flour with pureed (or finely mashed) blueberries.
STEP 7
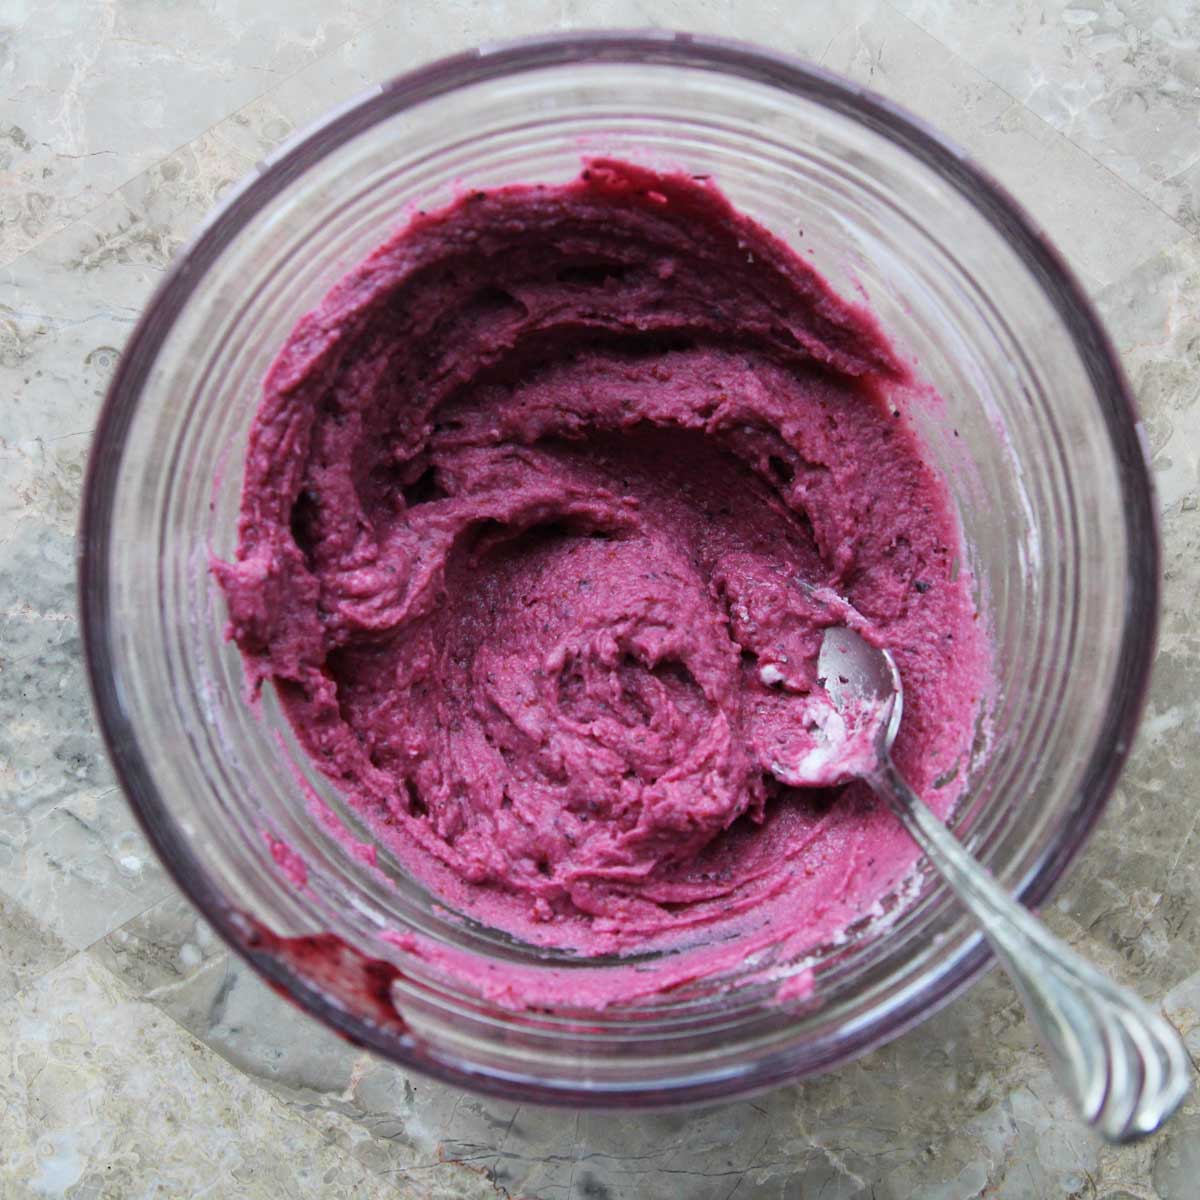
Microwave the combined dough in the microwave for 2 minutes.
STEP 8
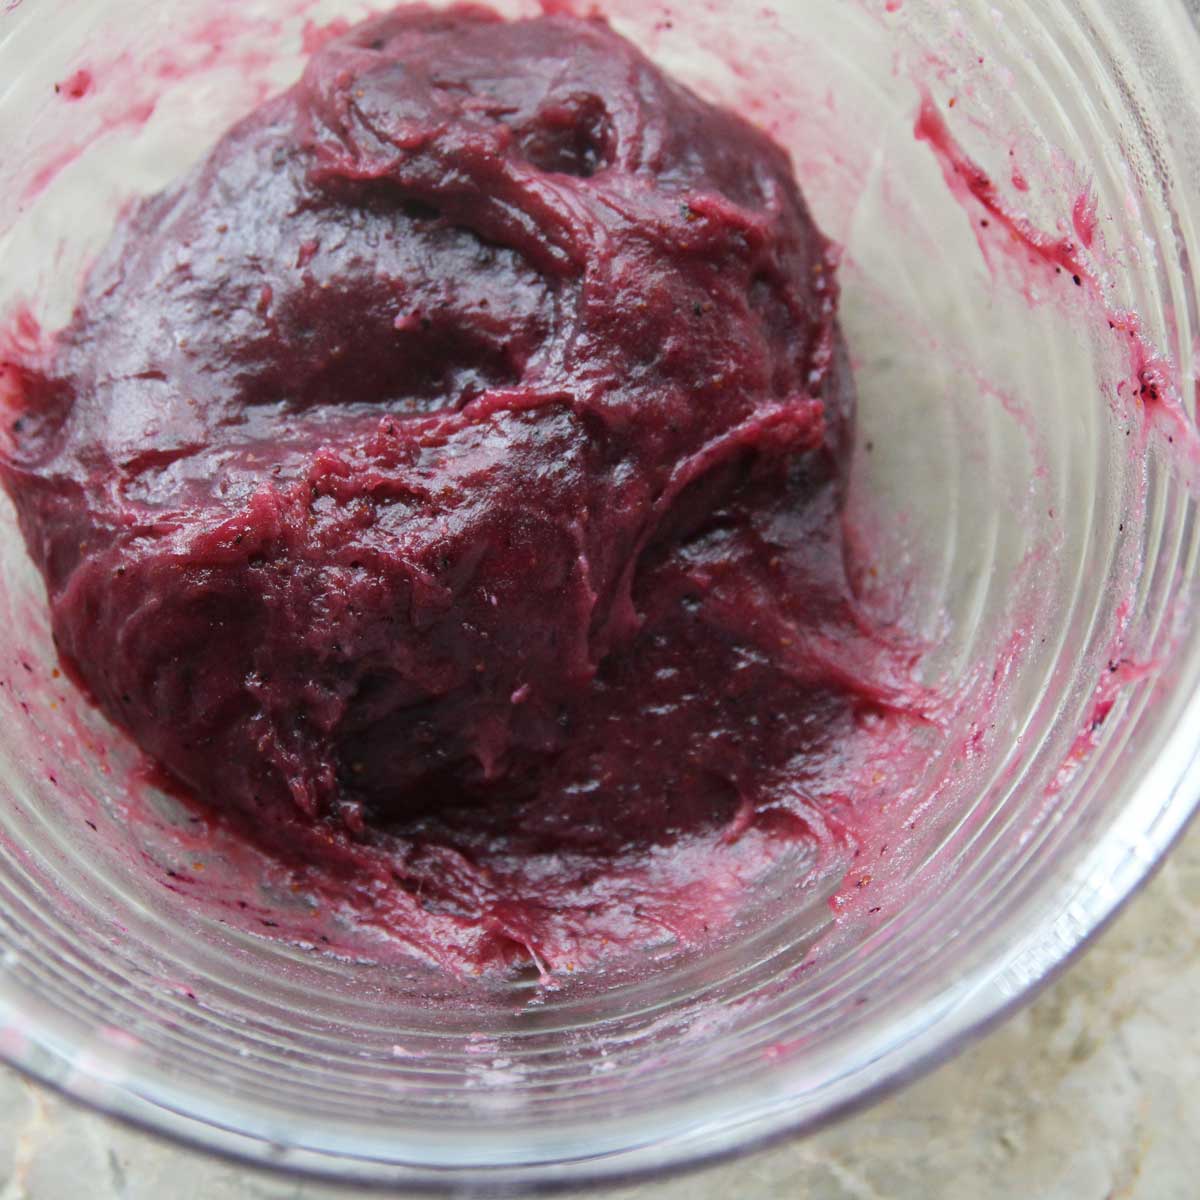
Use a solid metal spoon to stir the cooked mochi mixture. Return to microwave and heat for an additional 1 minute. You'll know when it is ready when the dough is slightly translucent
STEP 9
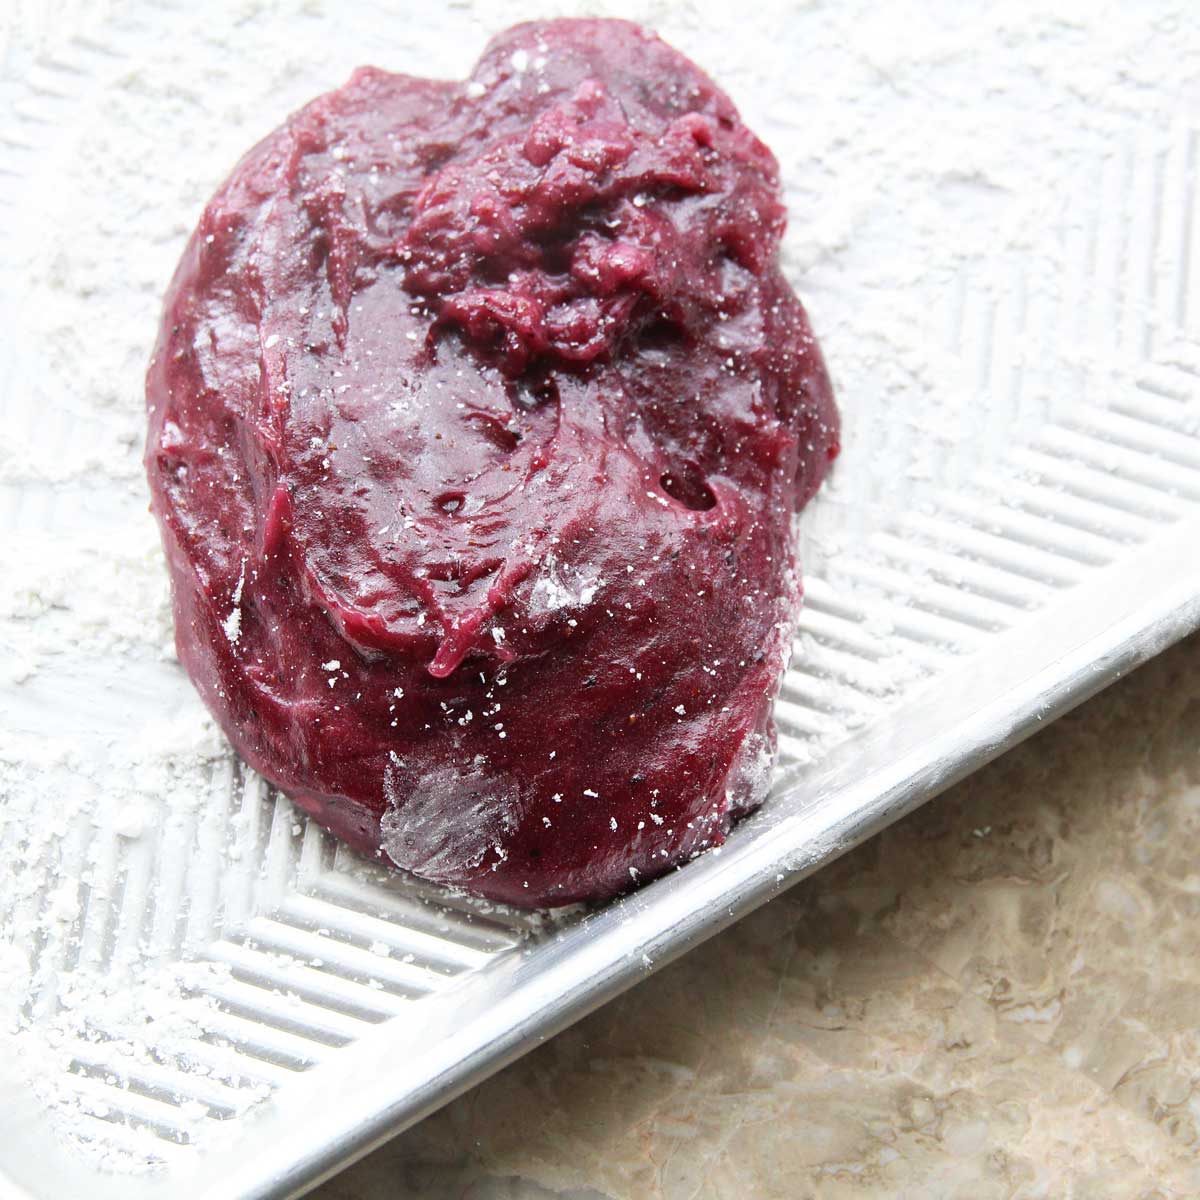
Drop the hot mochi dough onto a surface floured with corn starch. Flatten, and use kitchen shears/ scissors to cut the mochi into 5 to 6 pieces. Handle with care, or use vinyl gloves, as the mochi dough will be HOT
STEP 10
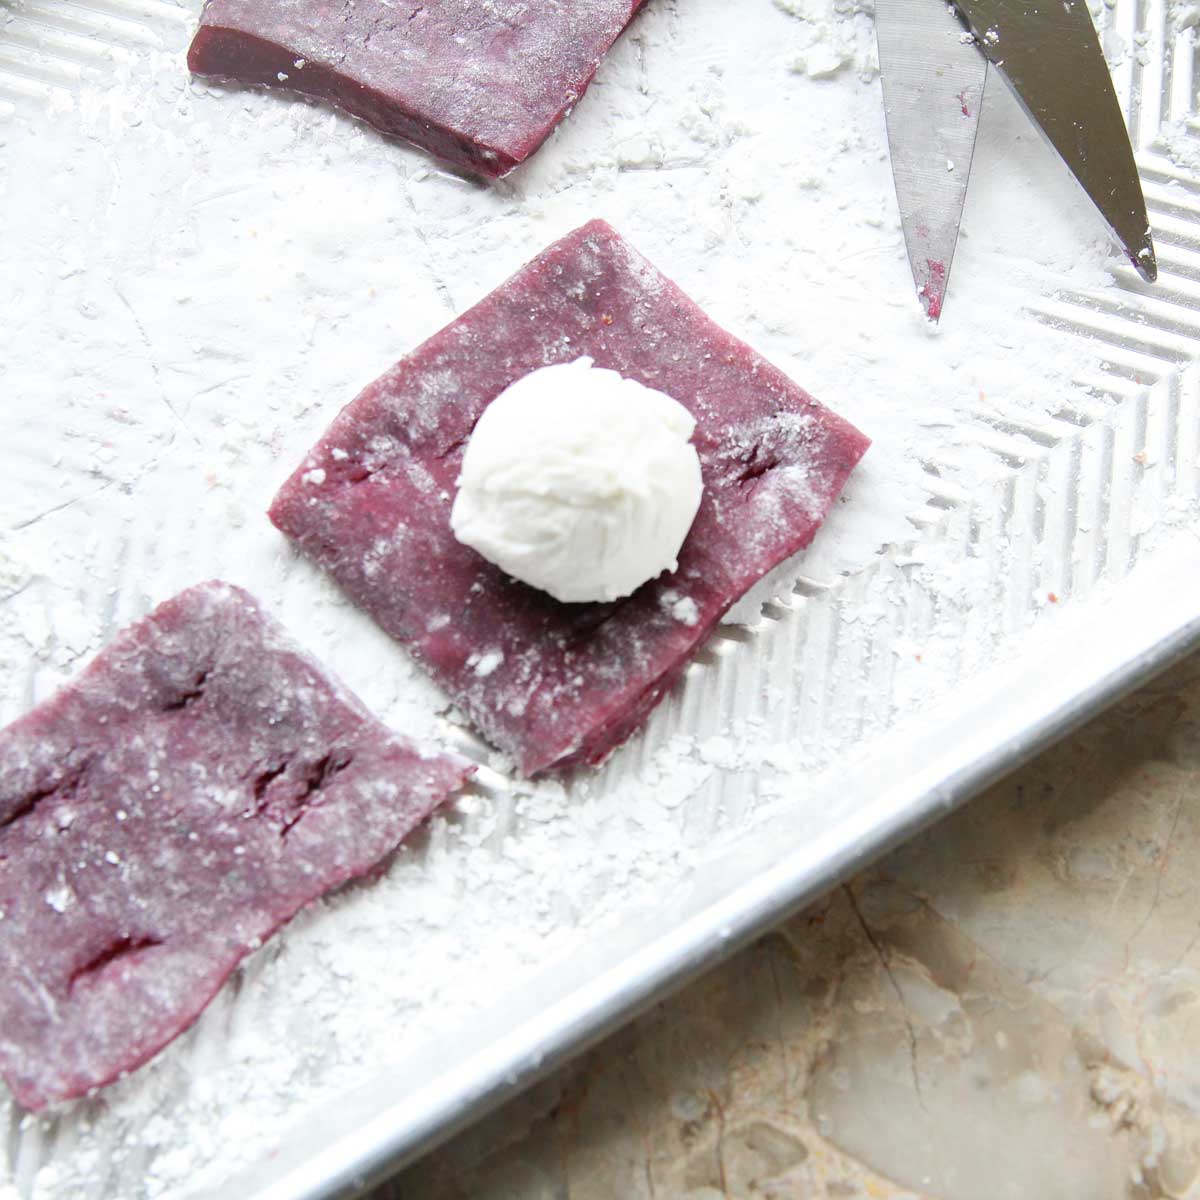
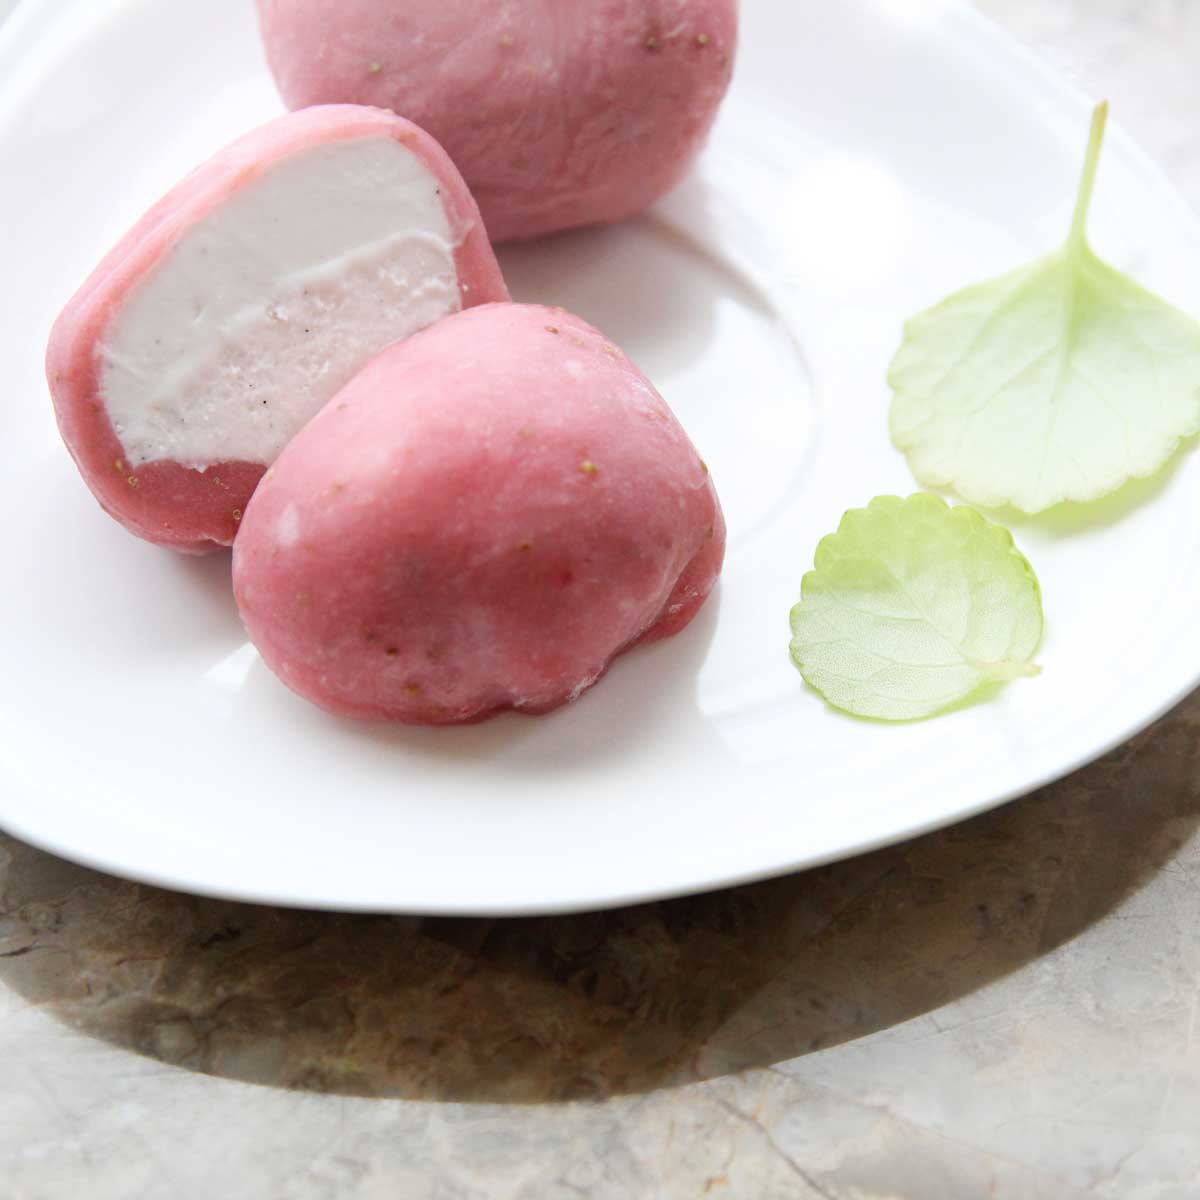
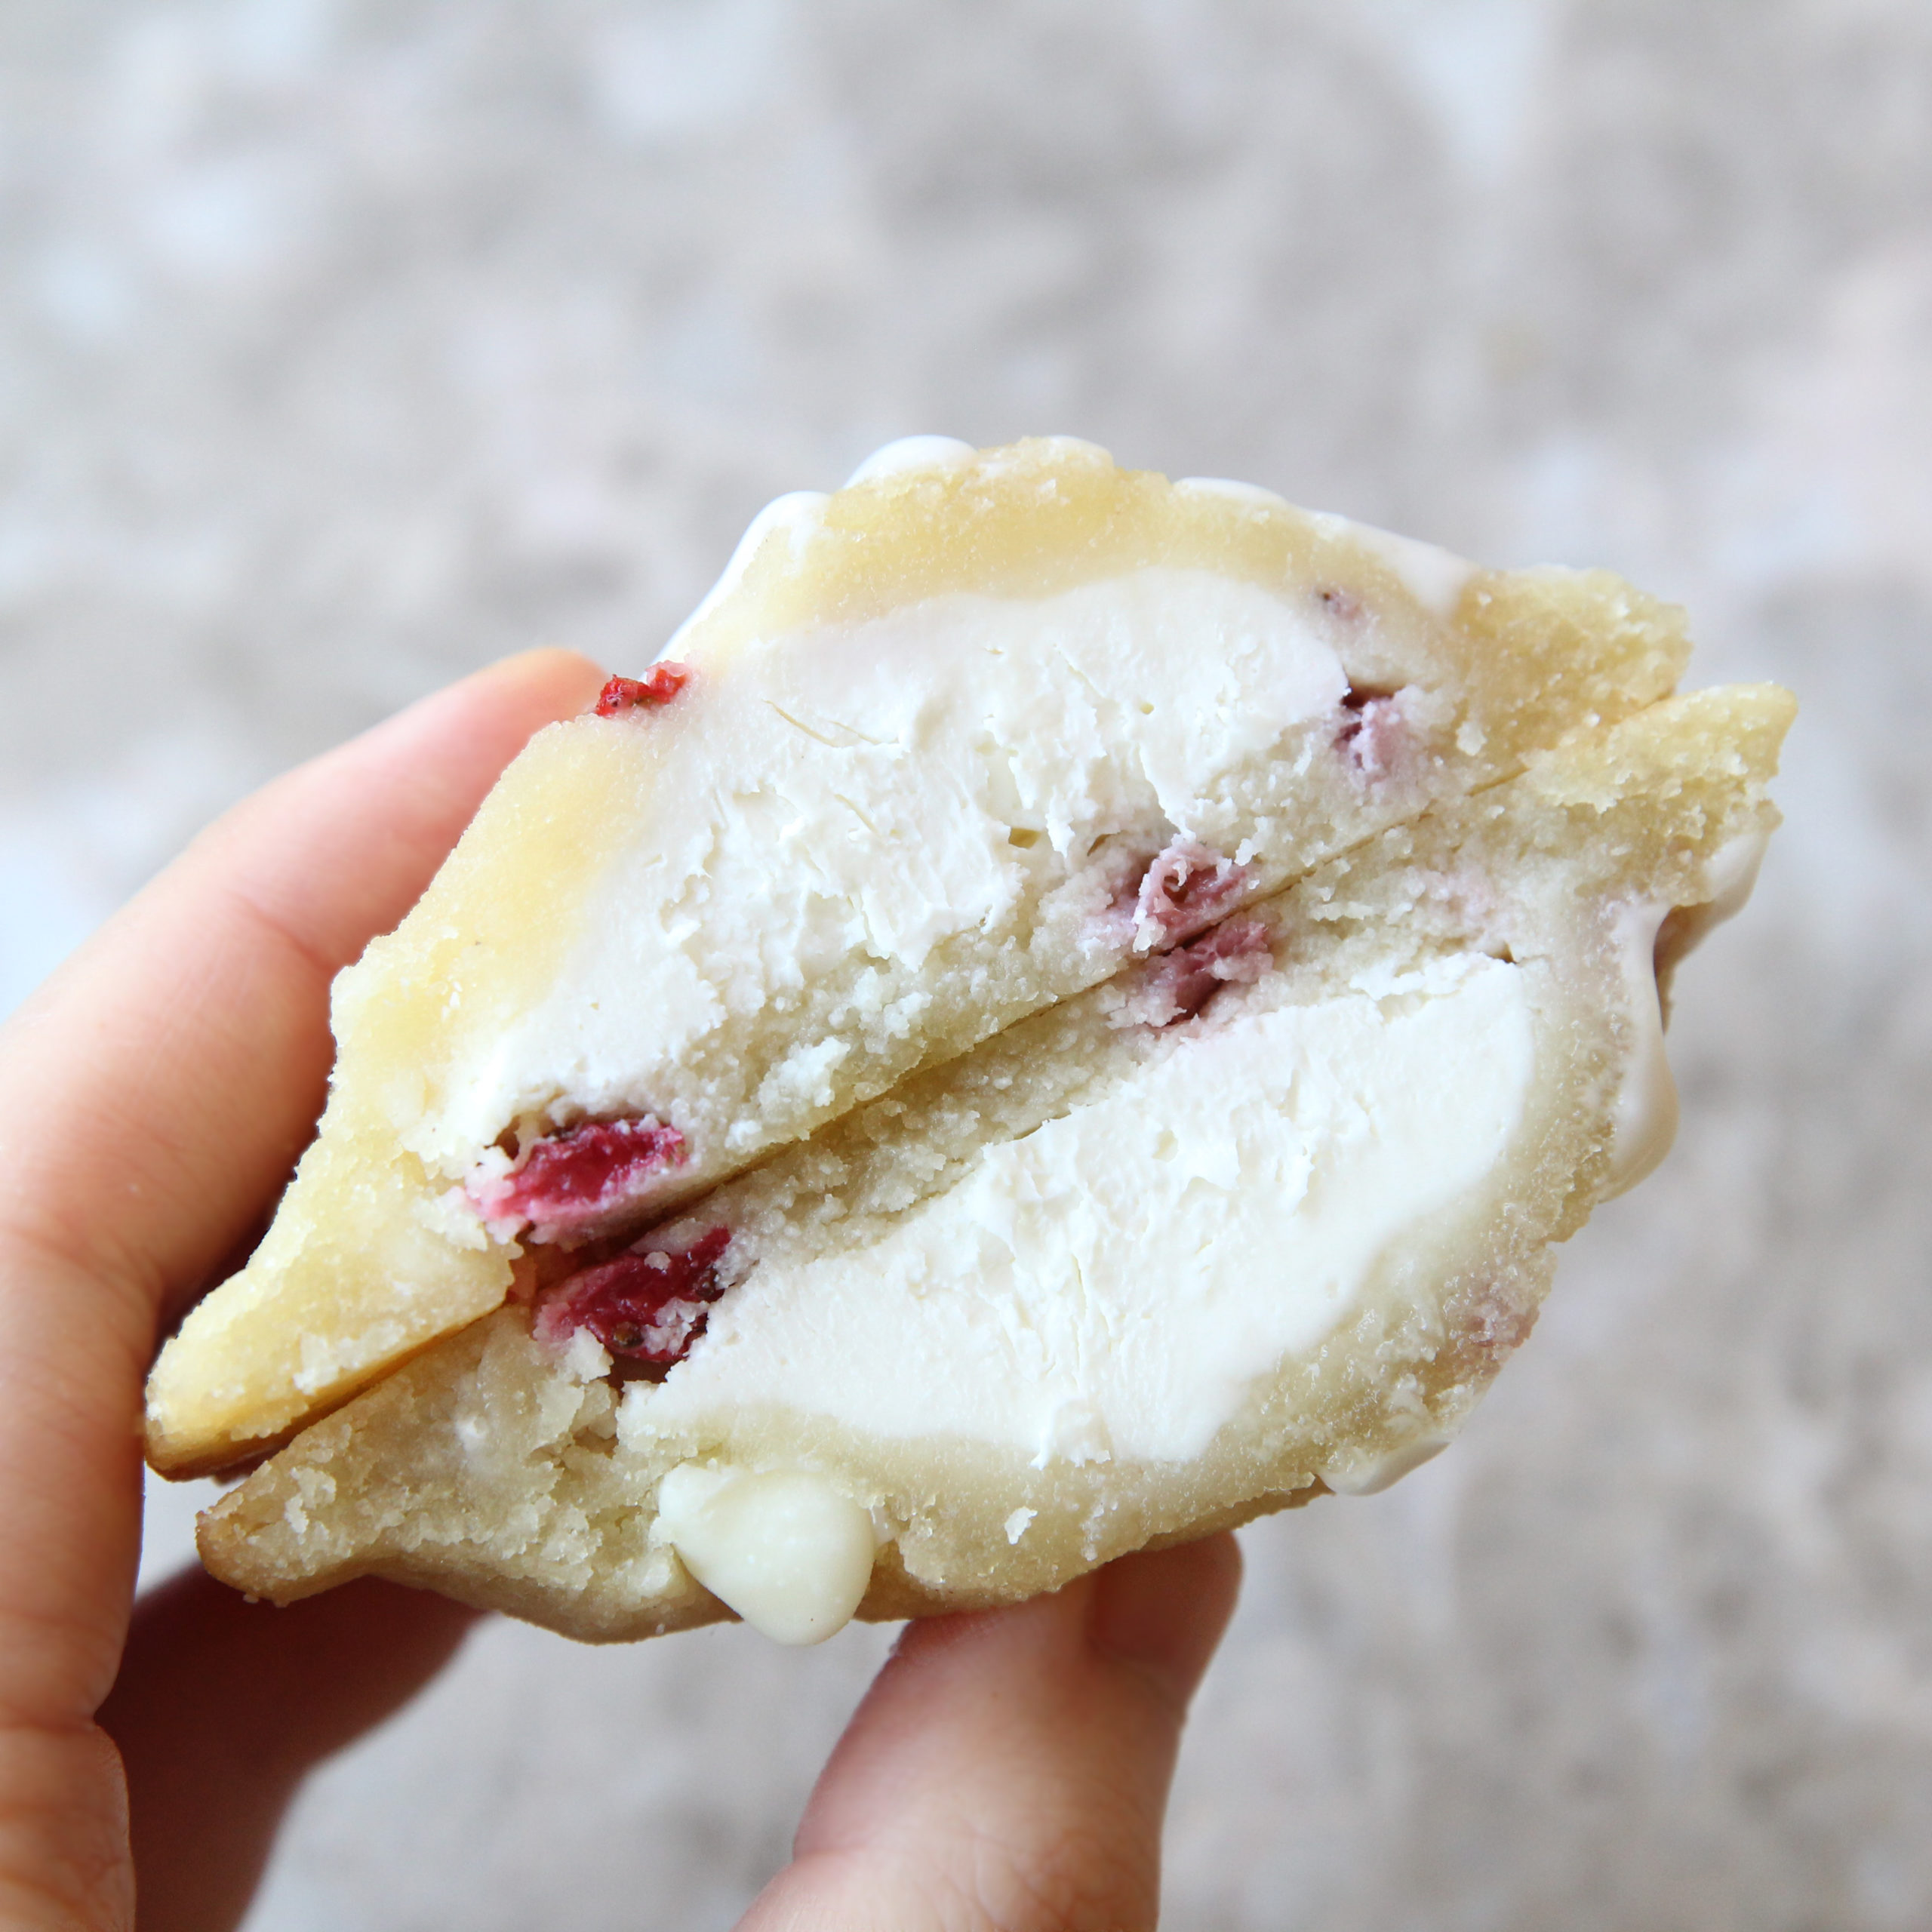
Let the mochi cool to room temperature before wrapping the mochi dough around the prepared ice cream filliing.
OPTIONAL: For best results, use a rolling pin to thin out the mochi dough before wrapping the ice cream. This ensures a thinner, more even mochi skin.
STEP 11
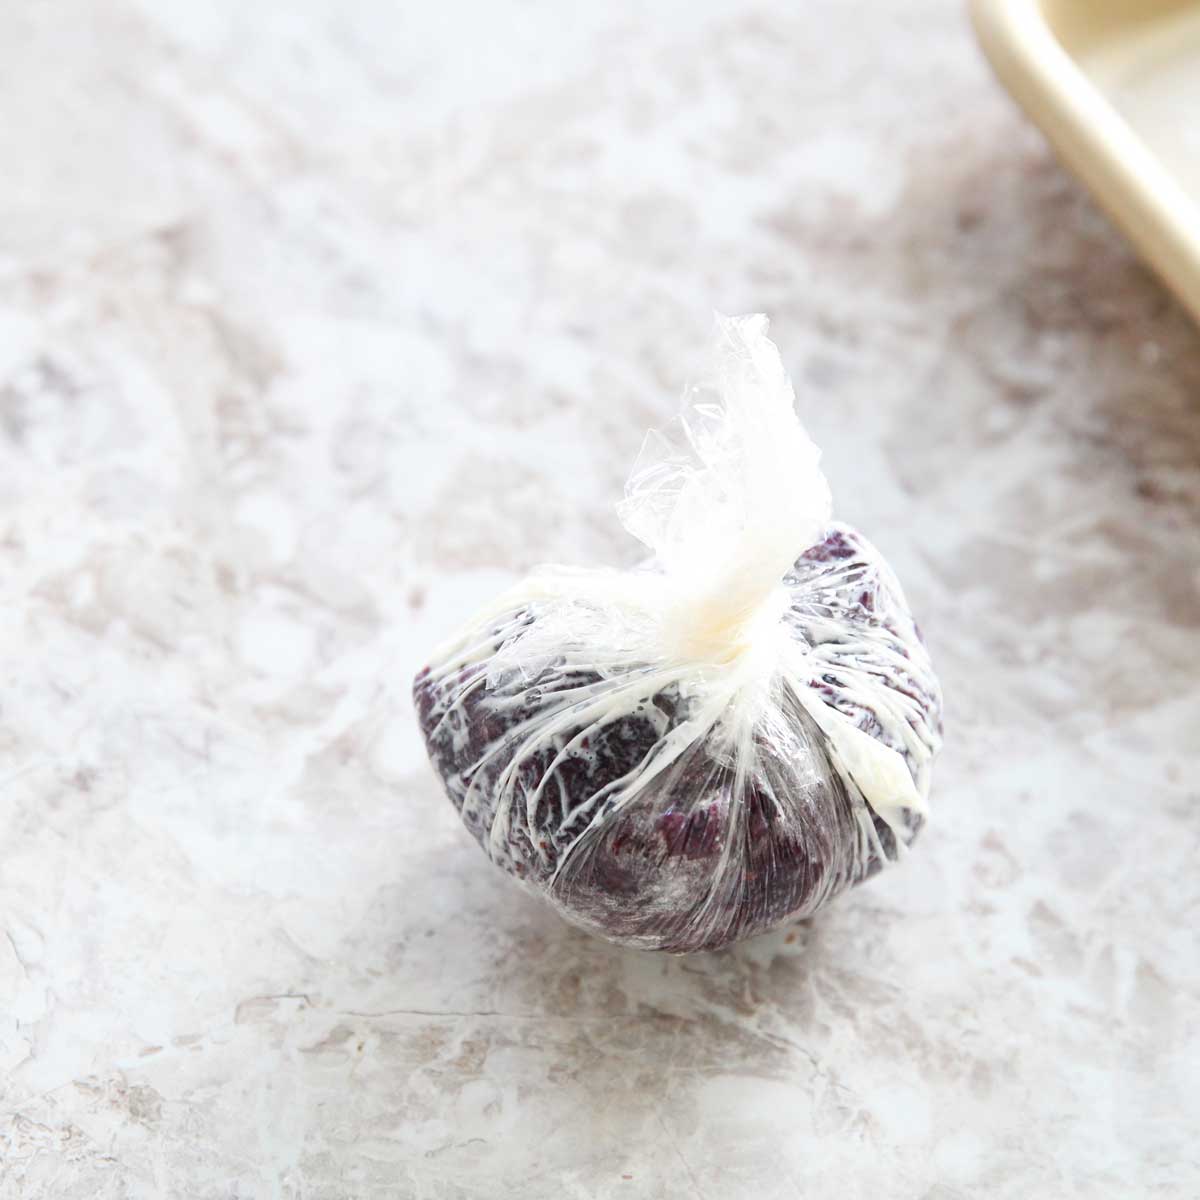
Wrap the finished mochi in the plastic wrap (from wrapping the scoop of ice cream before) and freeze for about 30-60 minutes before serving.
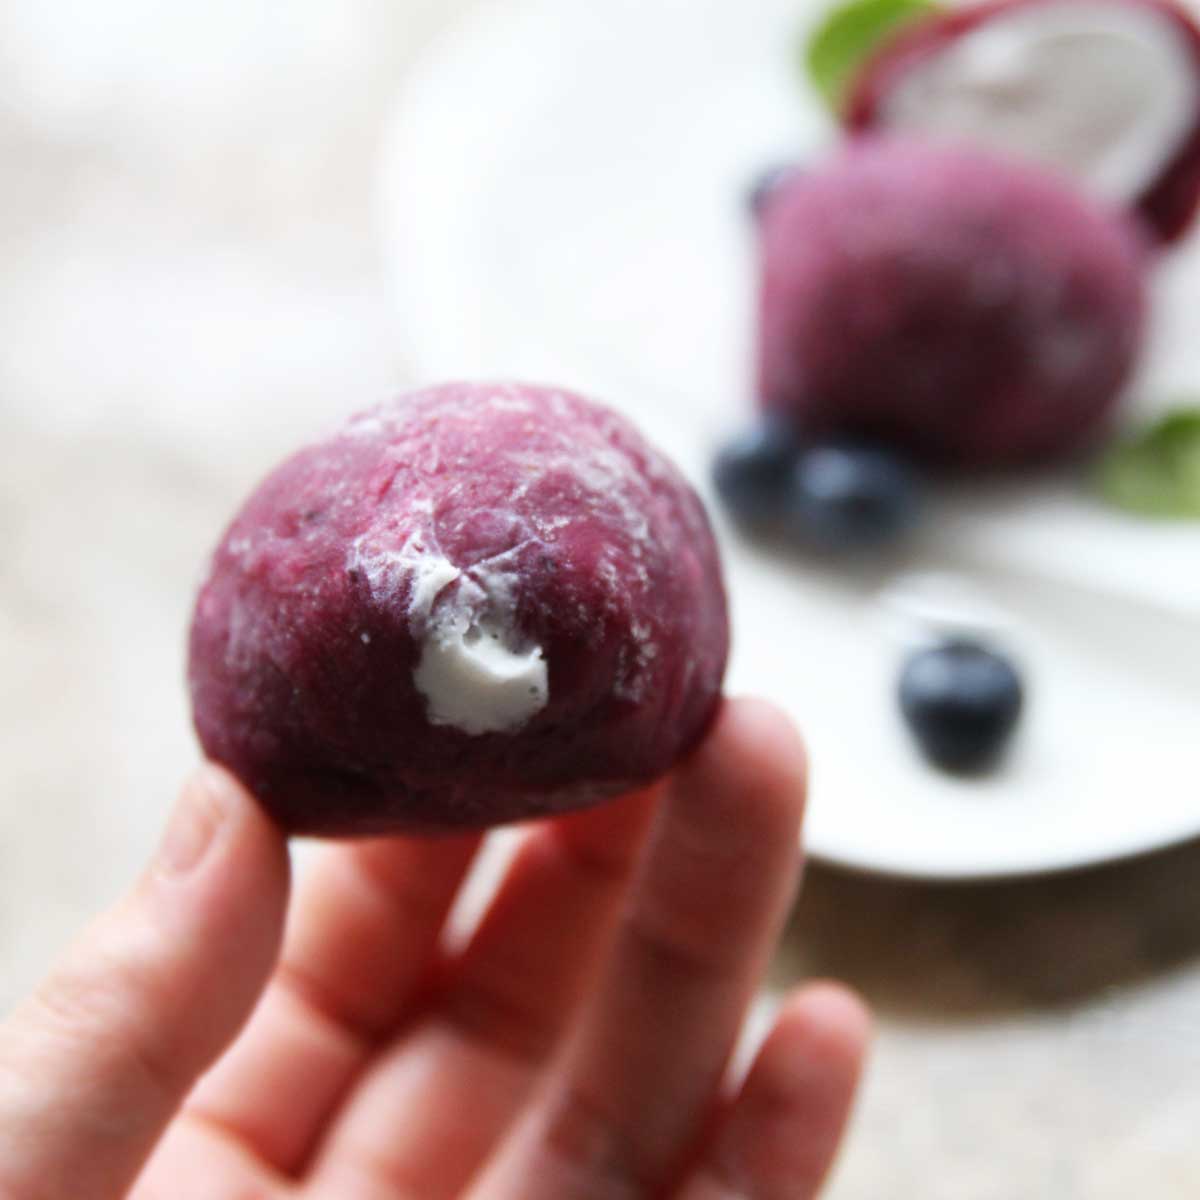
OPTIONAL: Once they're frozen solid, I brushed away the corn starch that we used to keep the mochi from sticking to our hands in the previous step with a clean wet paper towel to remove the excess corn starch and small bits of ice cream left on the mochi surface.
STEP 12
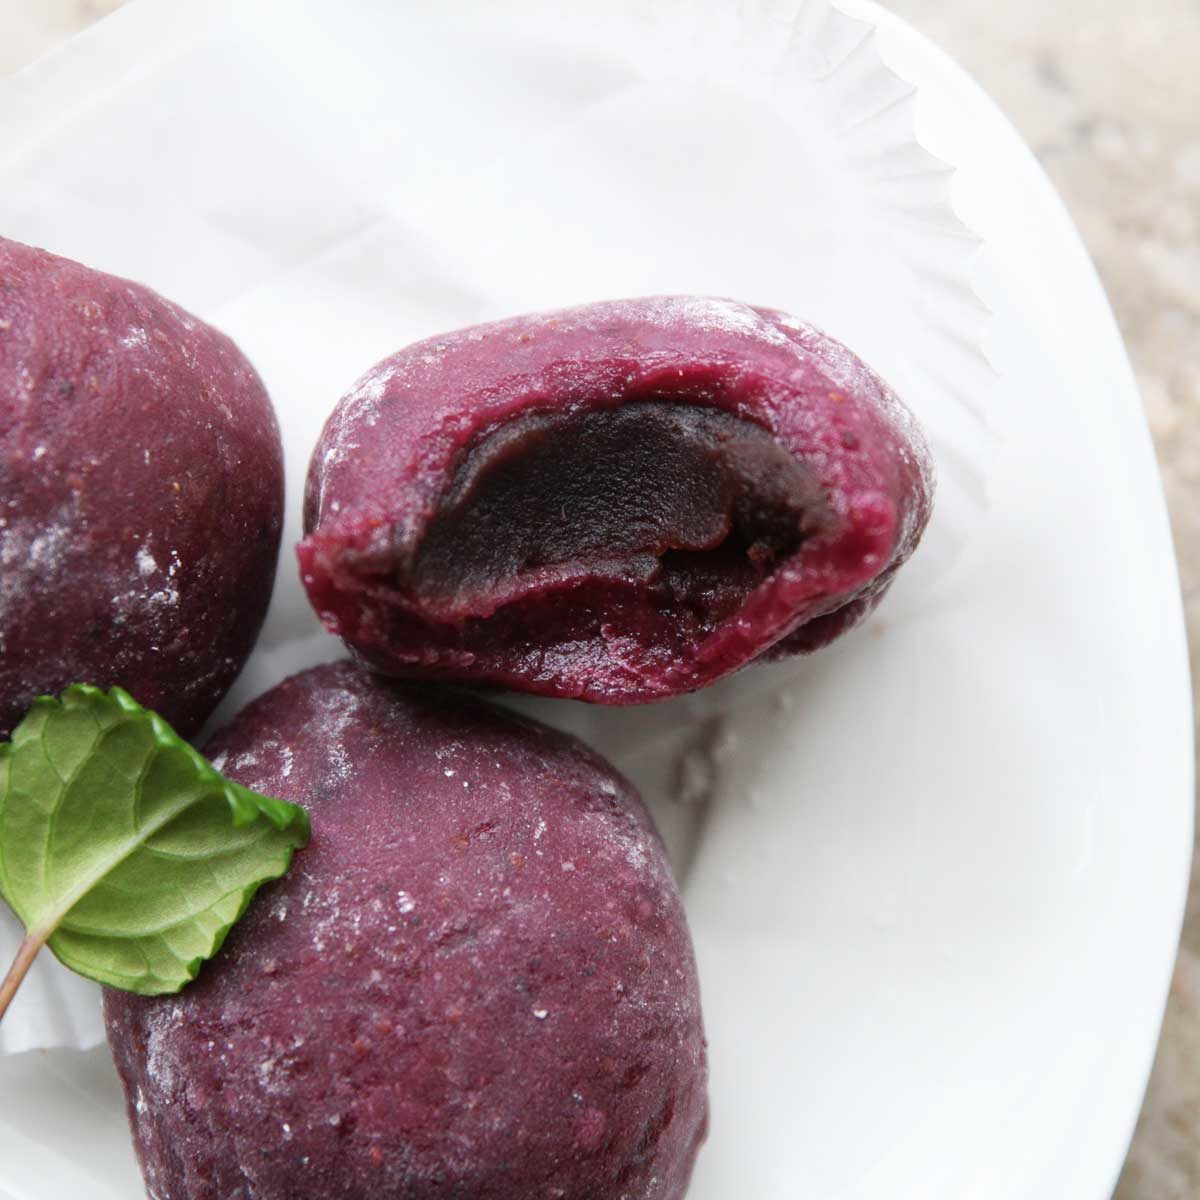
ENJOY!
More Ways to Enjoy Blueberry Mochi Ice Cream
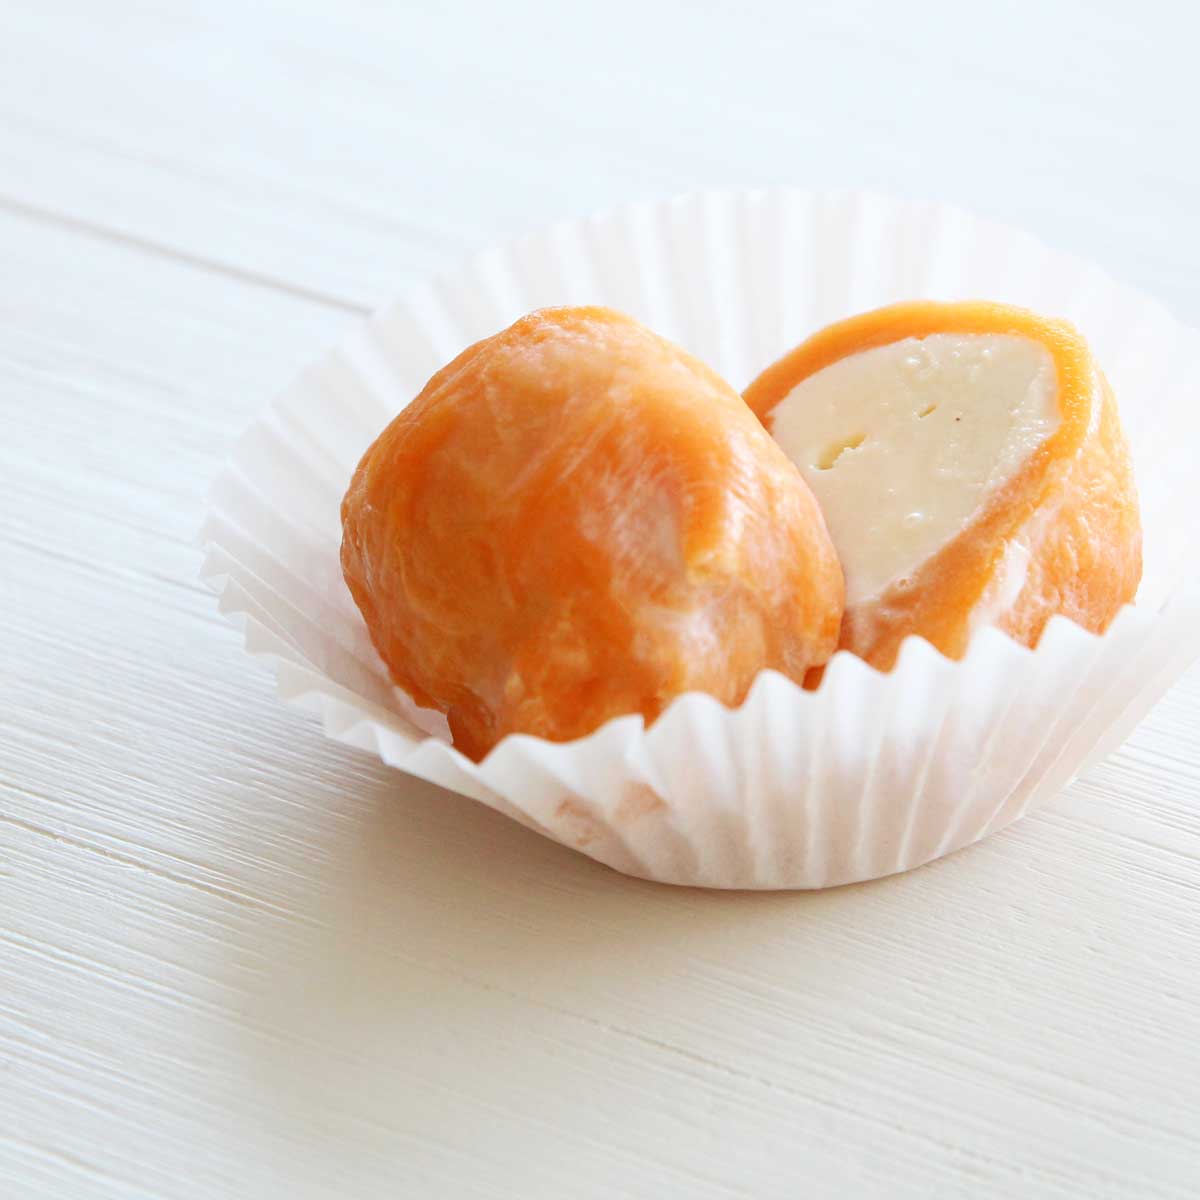
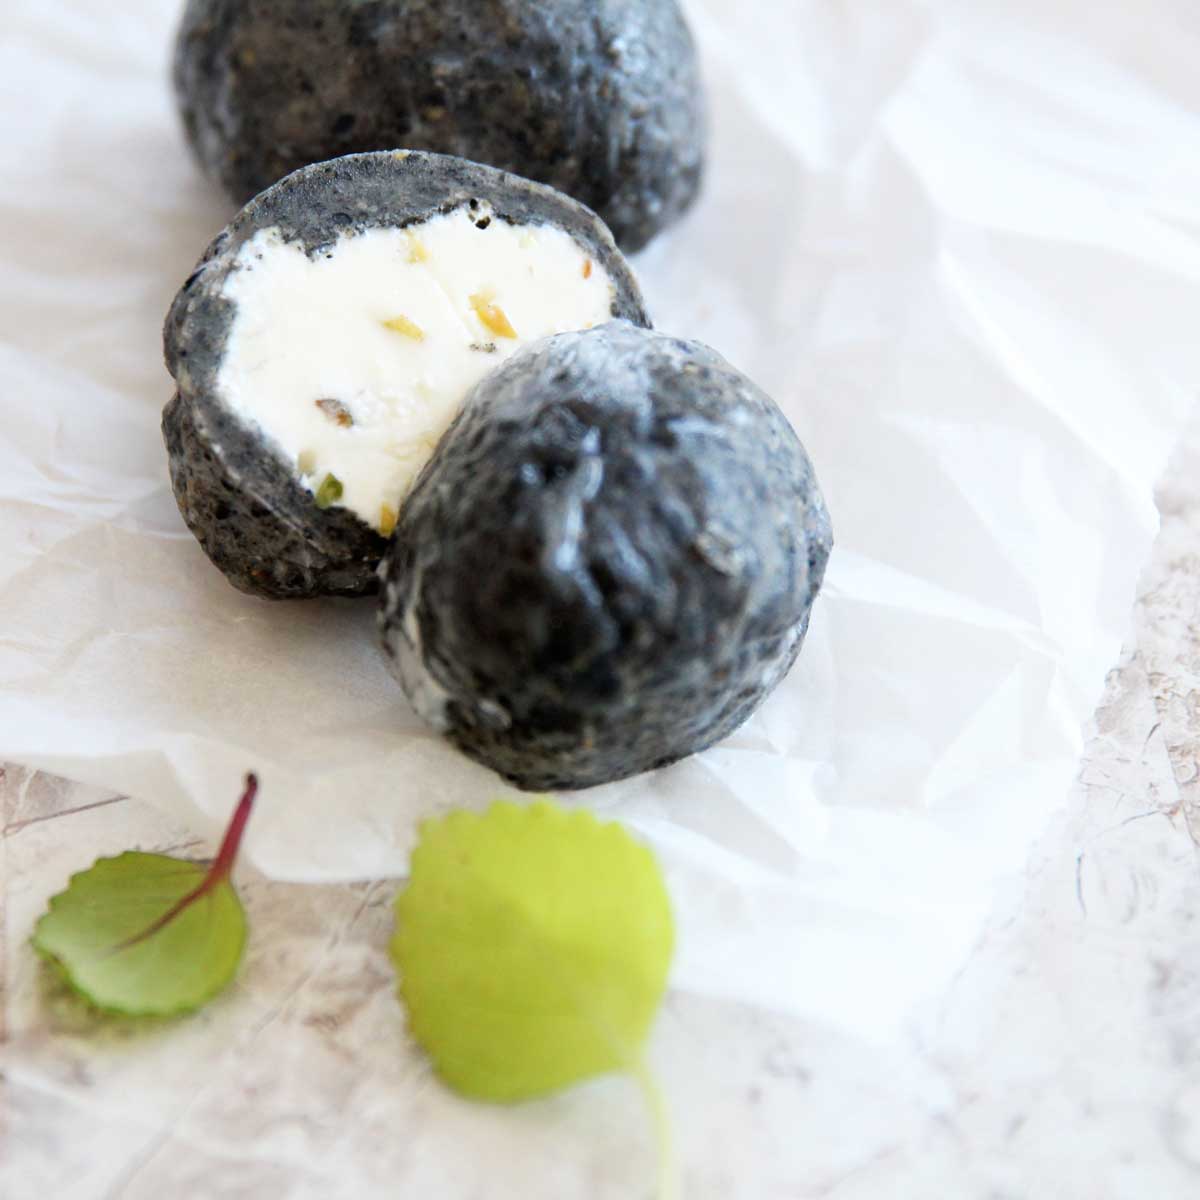
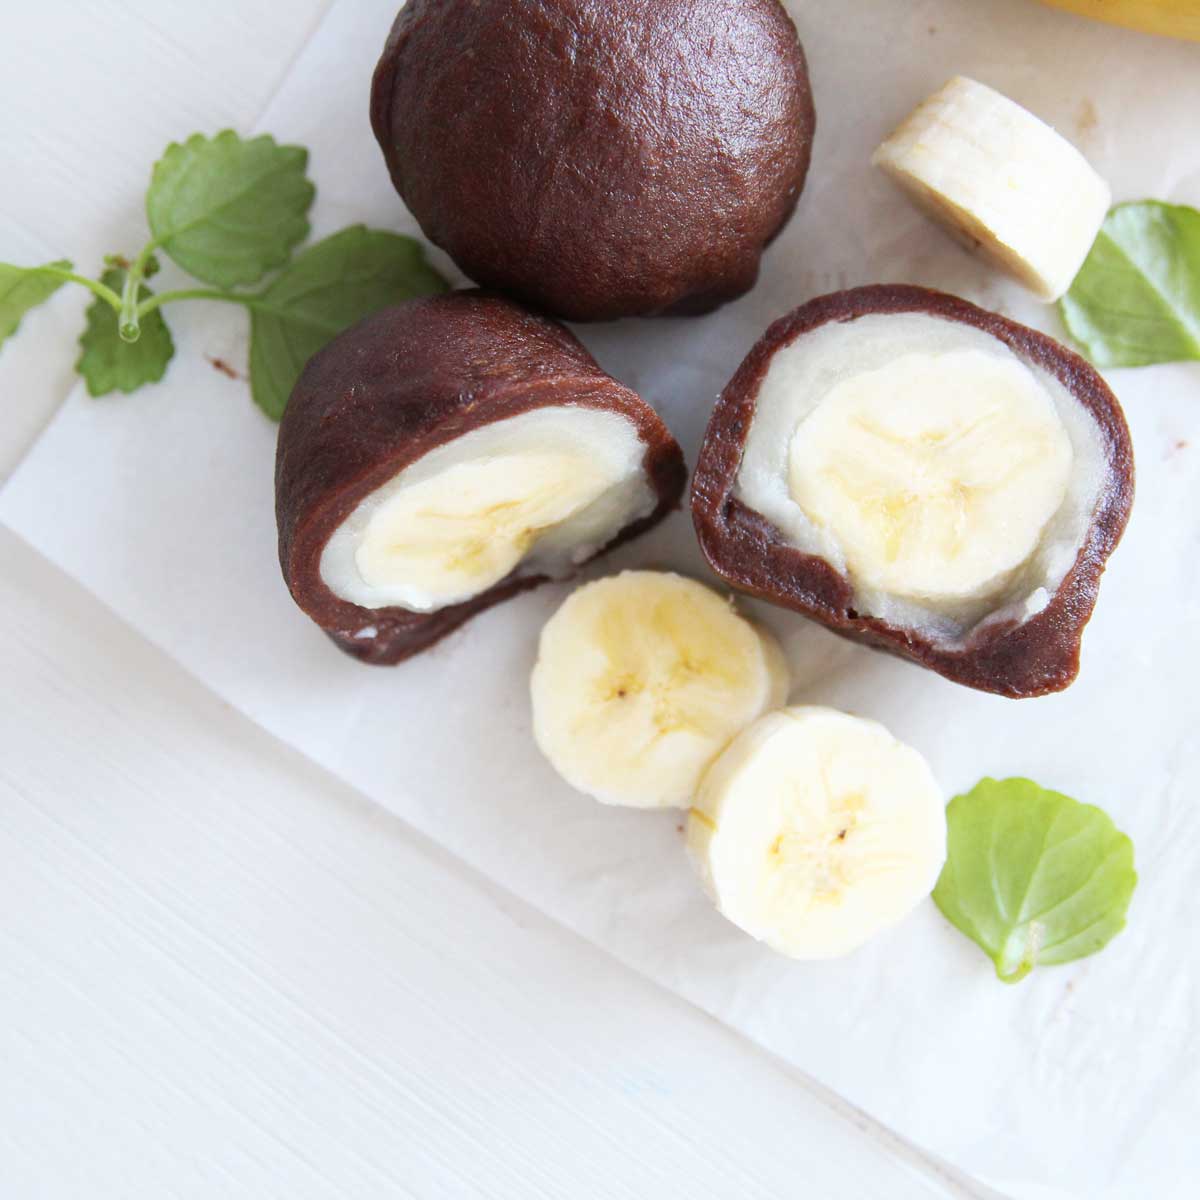
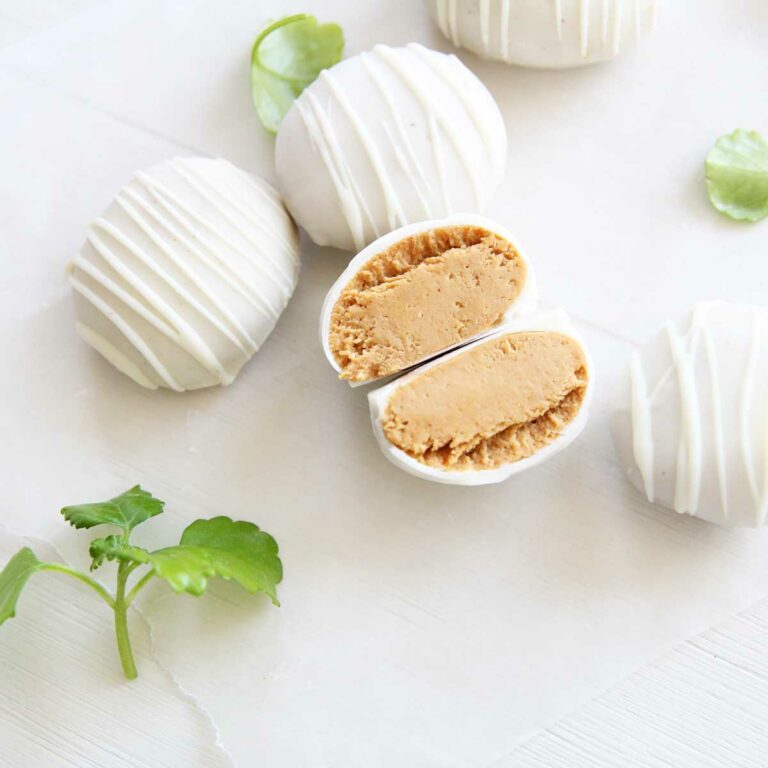
Instead of ice cream, you're welcome to fill these blueberry mochi with other fillings, such as sweetened red bean paste, below
- Sweetened Red Bean Paste (a.k.a. Koshi An): You can find Sweetened Red Bean paste in most Asian grocery stores, and online (Amazon). There are Fine and Coarse kinds (I used coarse).

or,
- Sweetened White Bean Paste (a.k.a. Shiro An) - the white bean version of the sweetened red bean paste.

Note on Substitutions
What is a substitute for glutinous rice flour?
There are no suitable substitutes for glutinous rice flour. While it is possible to make desserts with tapioca flour that have a similar chew and bounce as mochi, but it wouldn’t be called “mochi” in the traditional sense.
Is mochiko flour same as glutinous rice flour?
Yes, they are the same. Mochiko flour is just another name of glutinous rice flour, which is also synonymous with sweet rice flour
How to Store Blueberry Mochi Ice Cream
- Keep the mochi ice cream frozen, and defrost for about 5-10 minutes in room temperature before eating.
- The mochi ice cream can be kept in the freezer in a a plastic freezer bag or an airtight container up to 3-4 weeks.

Final Tips for Blueberry Mochi Ice Cream
- When making the mochi skin, use a solid metal spoon (wooden spoons might break!) to stir the cooked mochi mixture so that the cooked and uncooked parts are evenly mixed
- Use a microwave-safe bowl, preferably glass like pyrex
- Let the mochi ice cream defrost for about 5-10 minutes in room temperature before eating.
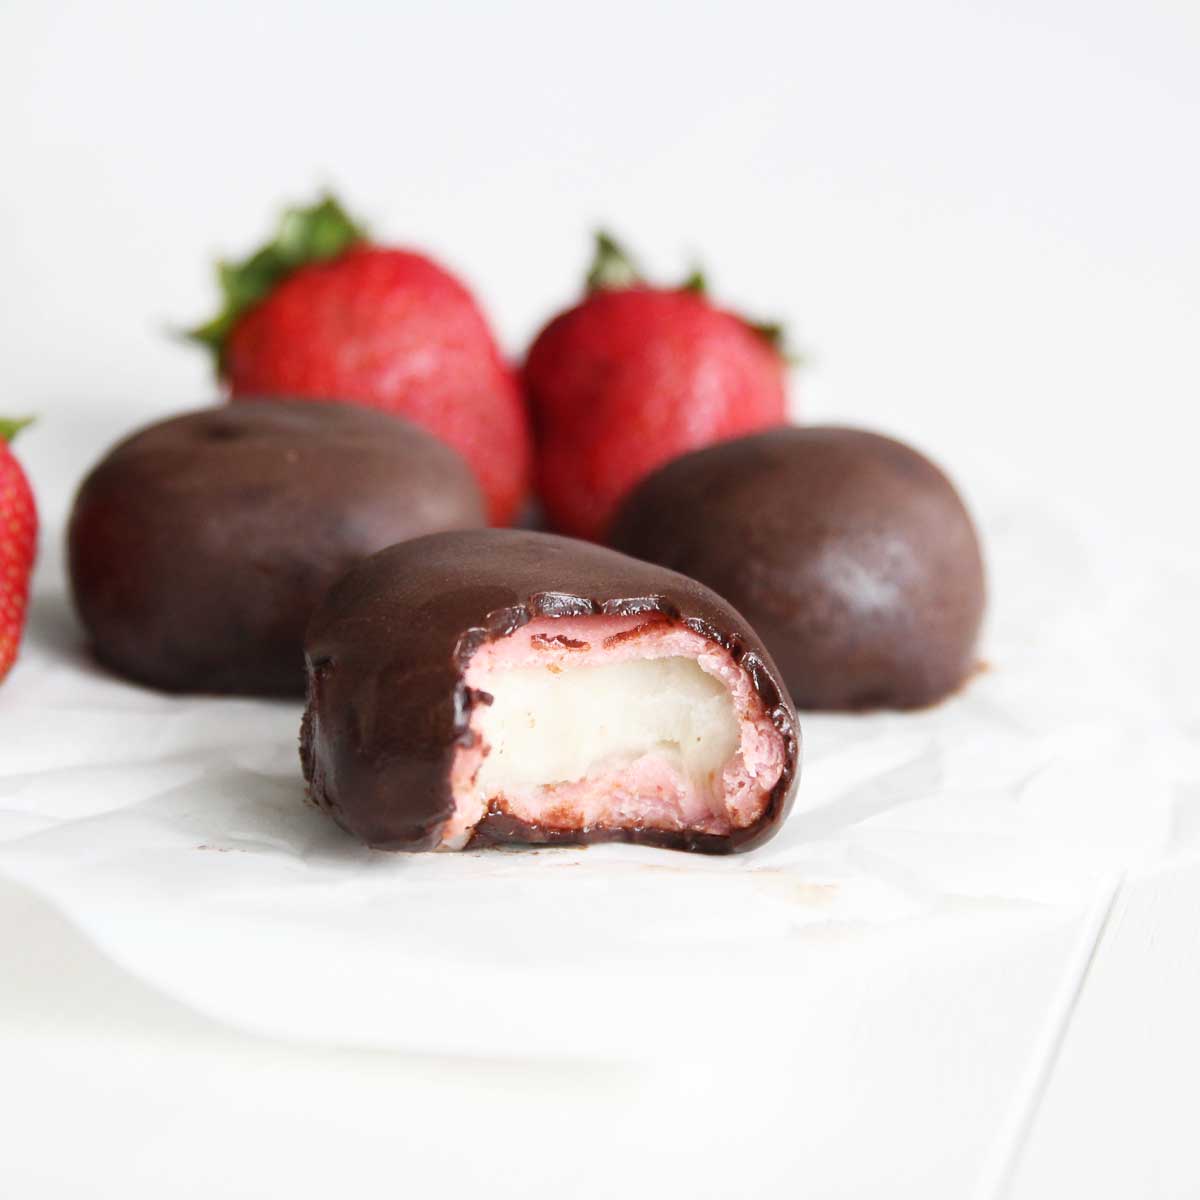
More Mochi Ice Cream Recipes You'll Love

Why do you add lemon juice to blueberries?
We add a splash of lemon juice to the blueberries when mashing or pureeing because the acid in the lemon juice brightens up the blue/purple hue of the blueberries. The lemon juice also brings out the sweet-tart flavors of the blueberries, not to mention how it contributes a good dose of vitamin C to the recipe.

Easy Vegan Blueberry Mochi Ice Cream
Ingredients
Mochi Ingredients
- 12 oz blueberries, pureed* yields about 1 cup of puree without the skin
- 1 cup mochiko flour, sweet rice or glutinous rice flour about 140 g
- 2 tsp lemon juice (optional)
- 2 Tbsp sugar of choice (omit if desired)
Other Ingredients
- ¼ cup corn, potato or tapioca starch
- 6 scoops ice cream of choice
Instructions
Prepare the filling (see options*)
- Prepare mochi filling by placing a scoop of ice cream into a piece of plastic clear wrap.
- Wrap the ice cream scoop with the plastic wrap
- Freeze the pre-scooped ice cream until completely frozen (about 1-2 hours). It's important for the ice cream scoops to be frozen solid to keep it from melting when covering them with the mochi skin. Keep them in the freezer until ready to use.
Make the Mochi
- Puree the blueberries in a mini blender until liquidy. Add lemon juice for the best color (optional).
- Filter the blueberry puree through a sieve and put aside the discards.
- In a microwave-safe bowl (preferably glass, like pyrex), mix the sweet rice flour with the blueberry puree
- Microwave the combined dough in the microwave for 2 minutes.
- Use a SOLID METAL spoon (wooden spoons might break!) to stir the cooked mochi so that the cooked and uncooked parts are evenly mixed
- Return to microwave and heat for additional 1 minute. You’ll know when it is ready when the dough is slightly translucent
- Scrape the cooked mochi onto the baking pan sprinkled with starch, and allow to cool to room temperatureOPTIONAL: For best results, use a rolling pin to thin out the mochi dough before wrapping the ice cream. This ensures a thinner, more even mochi skin.
- Let the mochi cool to room temperature before wrapping the mochi dough around the prepared ice cream filling.
- Cut the mochi into 6 pieces using scissors
- Wrap the mochi dough around the prepared ice cream filling
- Wrap the finished mochi in the plastic wrap (from wrapping the scoop of ice cream before) and freeze for about 30-60 minutes before serving.
- OPTIONAL: I brushed away the corn starch (that we used to keep the mochi from sticking to our hands in the previous step) with a clean wet paper towel to get rid of the excess corn starch and bits of ice cream.
- To enjoy later, keep the mochi ice cream frozen, and defrost for about 5-10 minutes in room temperature before eating.


Leave a Reply