Who doesn't love stuffed bagels? They're like Bagels 2.0. There's everything I love about bagels - their beautiful round shape, their shiny tops and chewy crust, but upgraded with a delicious creamy swirled stuffing that provides the perfect textural contrast to the heavy dense dough. While stuffed bagels are already quite popular in many cafes across East Asia, I haven't come across any stuffed bagel places in the US and wanted to figure out how to make my own at home. So here it is, a post on how to stuff bagels, step-by-step.
First You'll Need:
A Bagel Dough
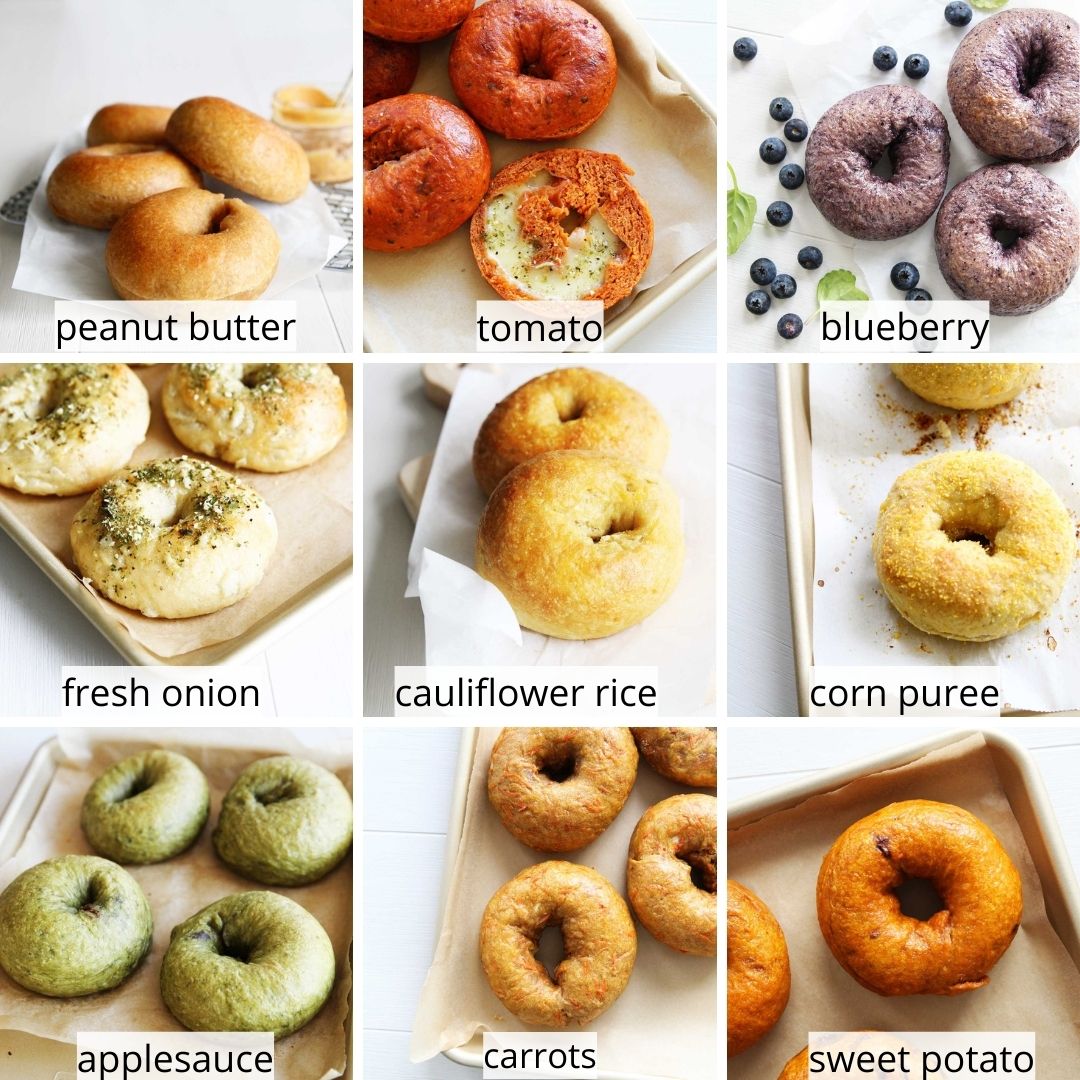
You can use any bagel dough to start out the stuffing process. I like this basic bagel dough recipe from King Arthur Flour, but you can also use one from this blog like this Applesauce Bagel Dough. I like this applesauce dough because it's very easy to work with and also tastes slightly sweet thanks to the applesauce. The fiber in the applesauce also keeps the bagel nice and moist for much longer than traditional bagels made with just flour and water.
Here are some other bagel dough ideas for reference!
Stuffing of Choice
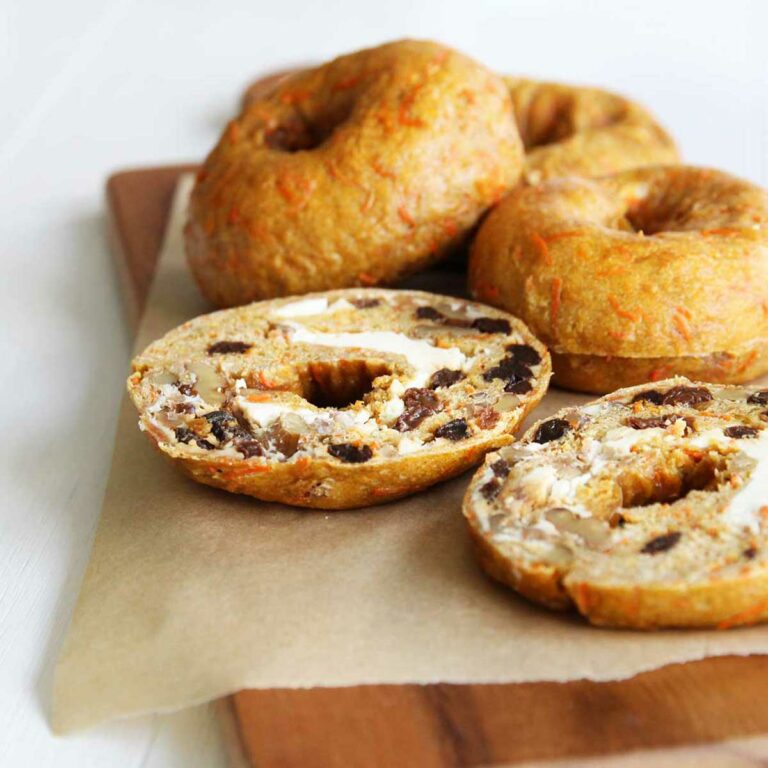
Next, we'll need the stuffing. The most standard bagel filling is cream cheese, but other thick paste-type fillings such as peanut butter, ganache, red bean paste, etc. work just as well! You can also incorporate add-ins like nuts or chocolate chips to enhance texture. More filling options are covered at the end section, but here's a handy list of 10+ different bagel fillings you can try (full list here).
Two Different Shapes of Filling
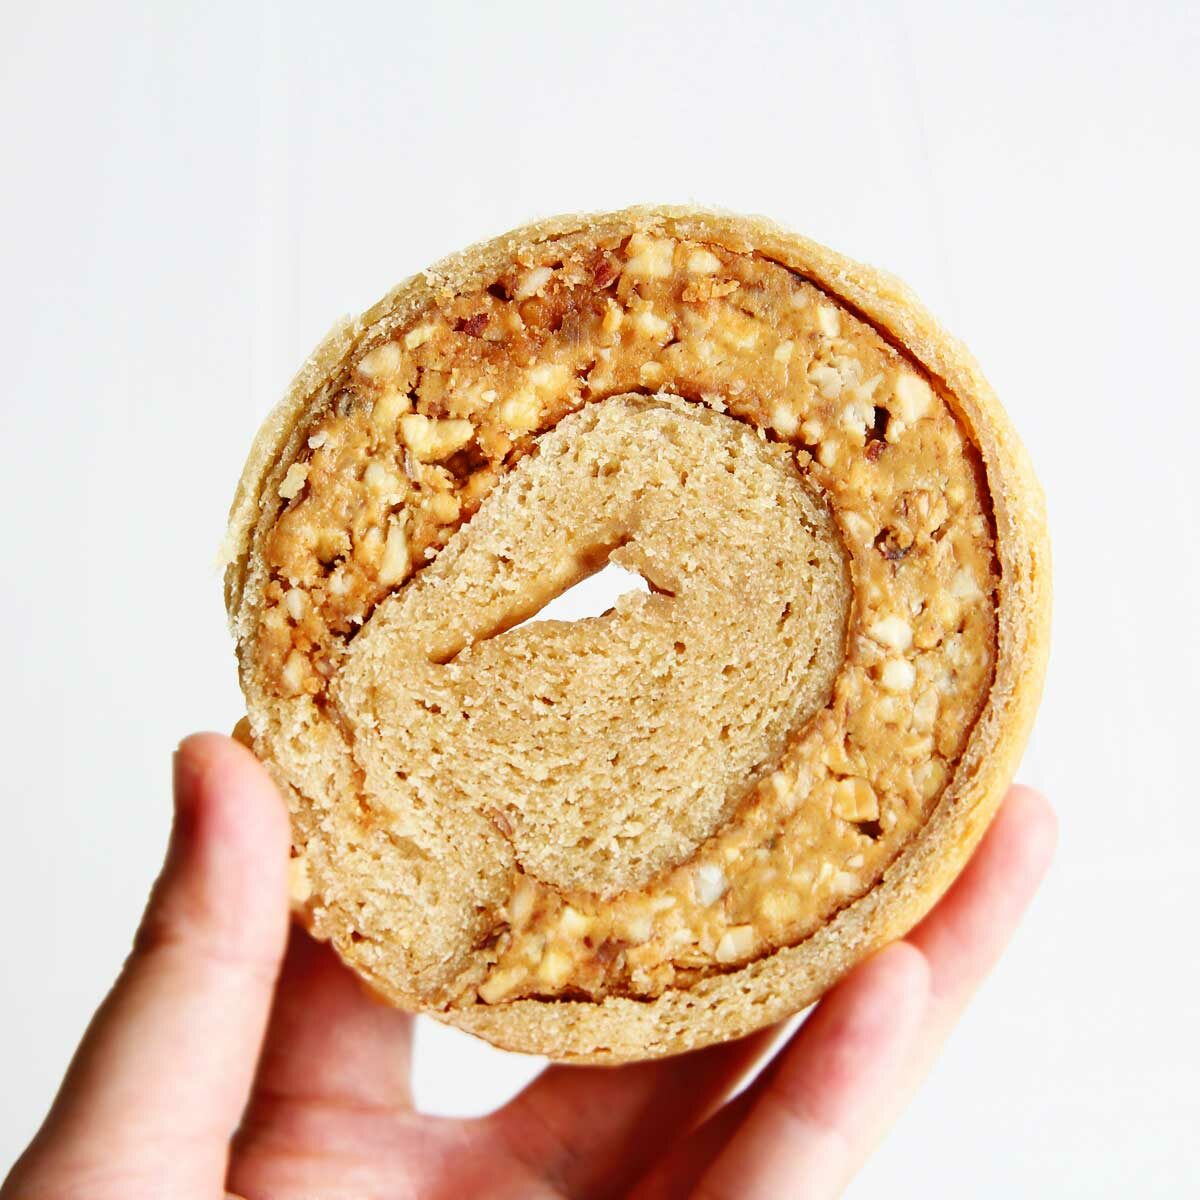
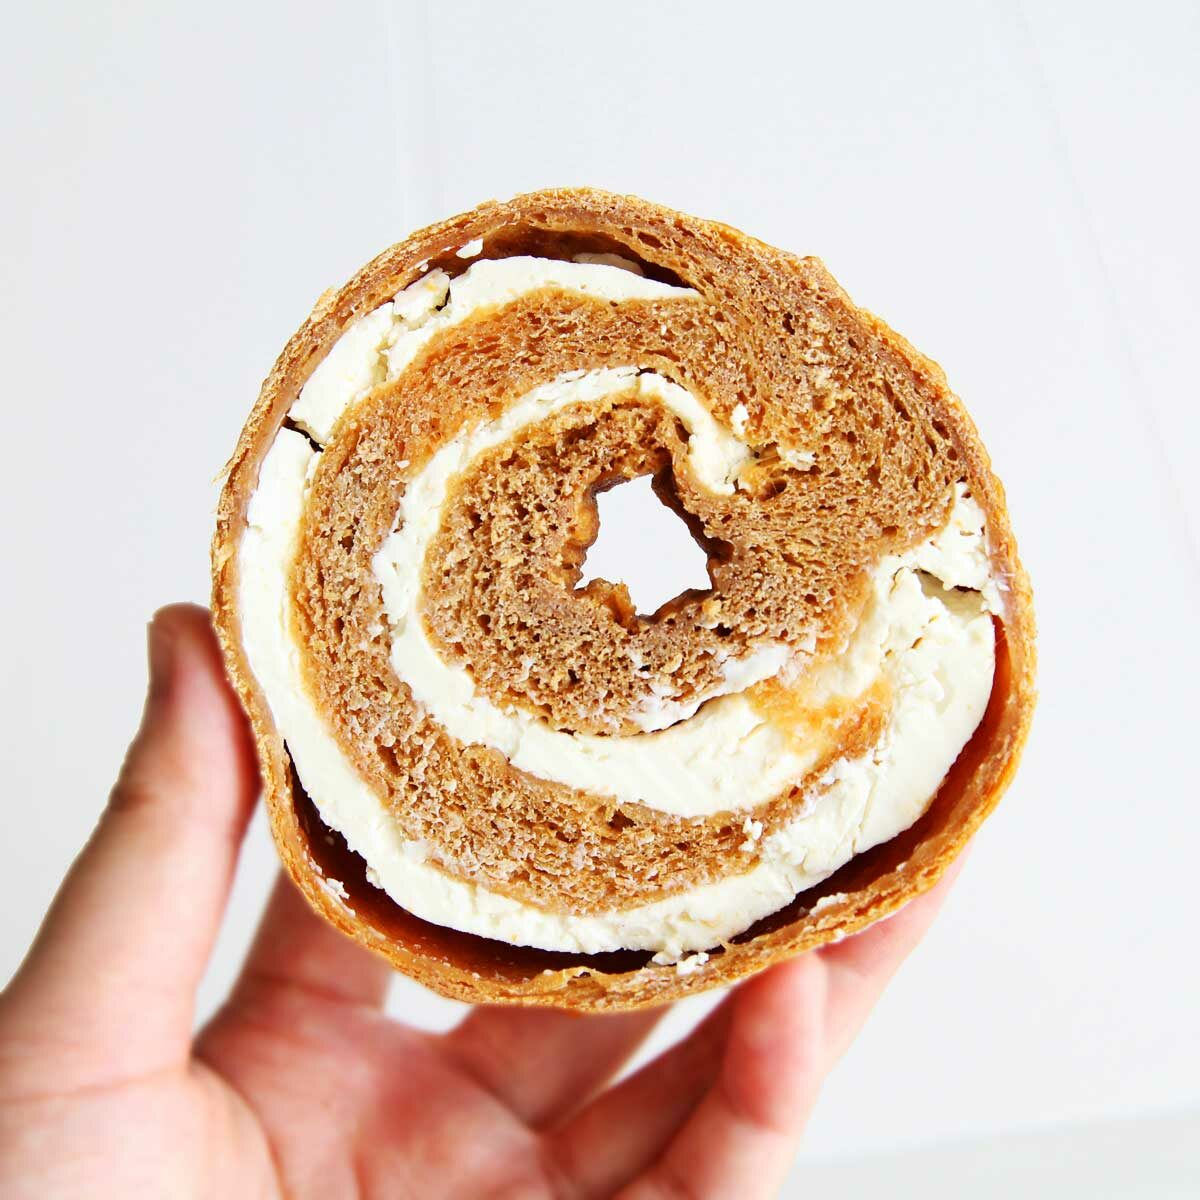
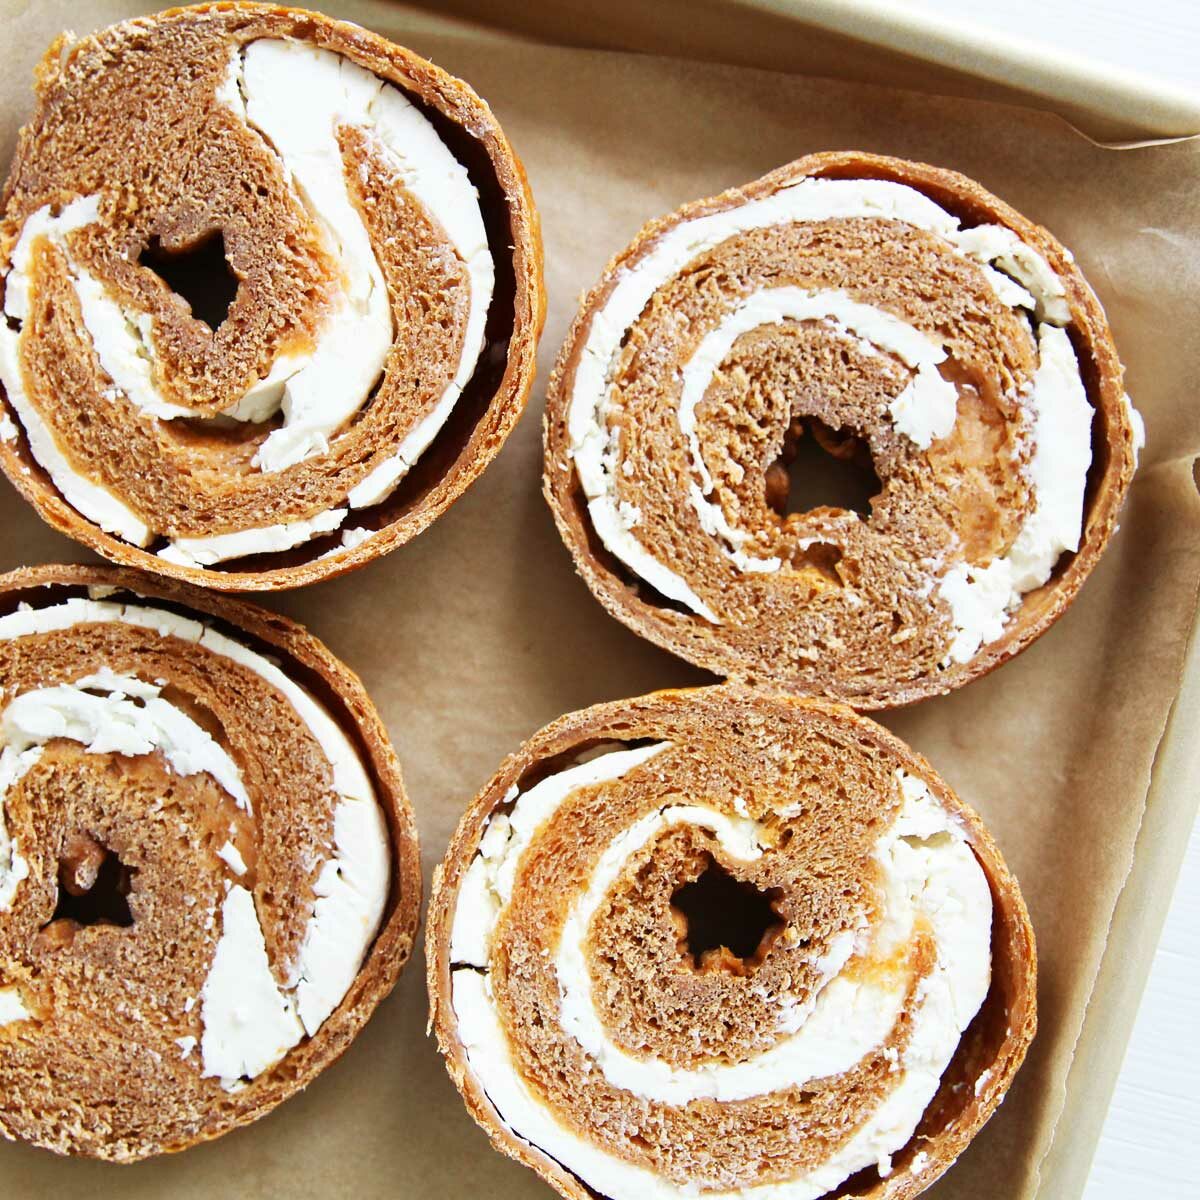
There are essentially 2 main ways to stuff a bagel. Depending on which way you choose you'll get either a crescent-shaped filling (like in the first pic, peanut butter bagels) or the spiral-shaped filling (like in the second pic, cream cheese pumpkin bagels). We'll cover the crescent-shaped filling first.
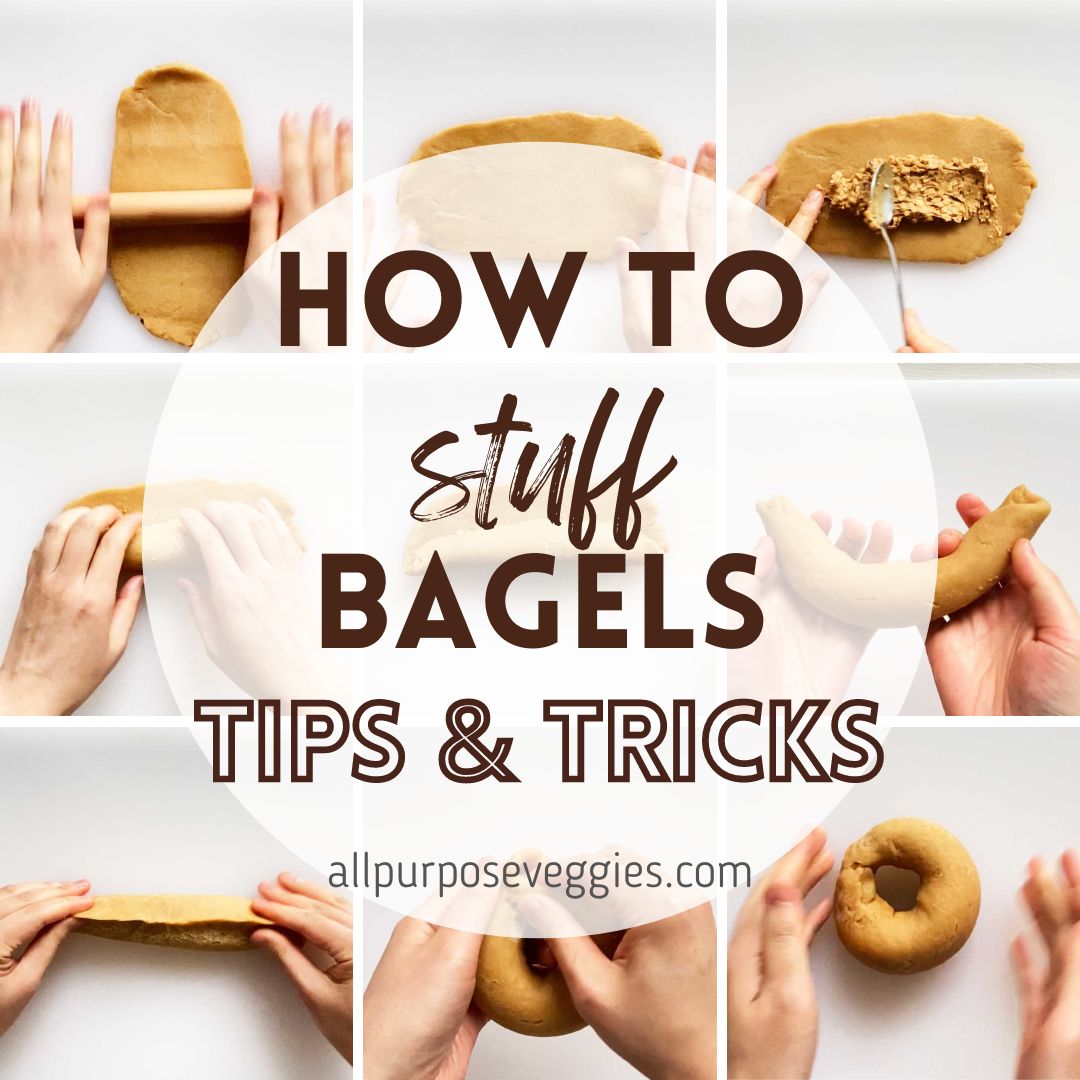
Step-by-Step Guide
Crescent Shaped Filling
First, prepare the bagel dough of choice, and allow it to go through the first rise. Divide the dough into portions.

Use a rolling pin to roll out each piece of the bagel dough into a thin, 5 x 7 inch rectangle
TIP: the thinner you roll out the dough, the better! This helps to create more layers within the bagel and also helps to seal in the filling since we'll roll the filling inside the flattened dough.
Spoon about 2-3 Tablespoons of the filling onto the bagel dough.
Place the filling towards one end of the rectangle.

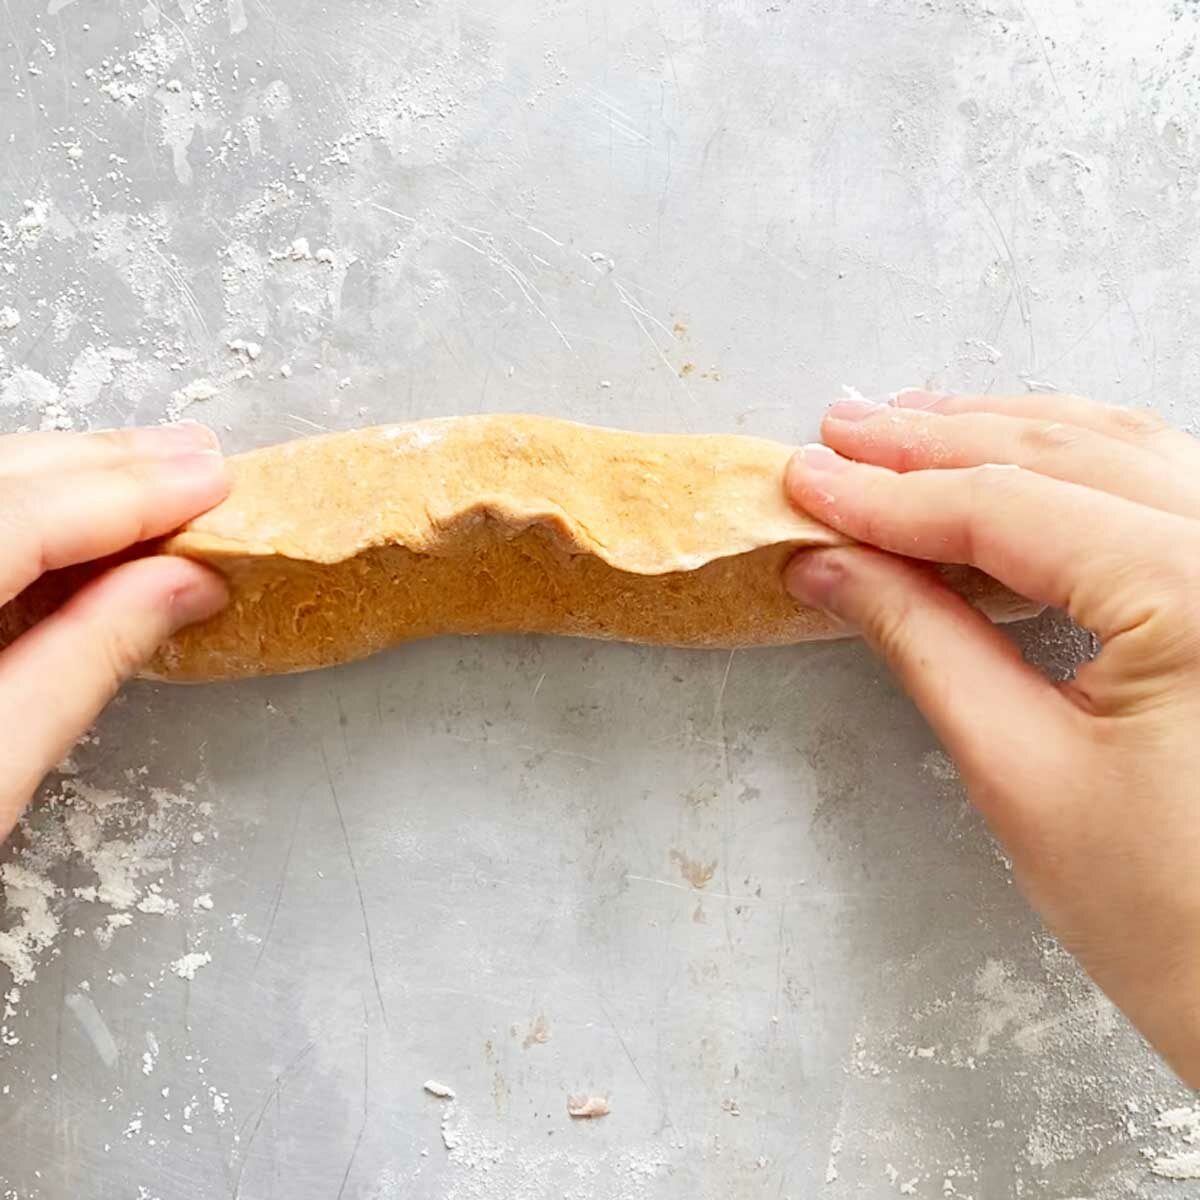
Roll the bagel dough over the filling, and seal the ends by pinching the seams of the dough with wet fingers.
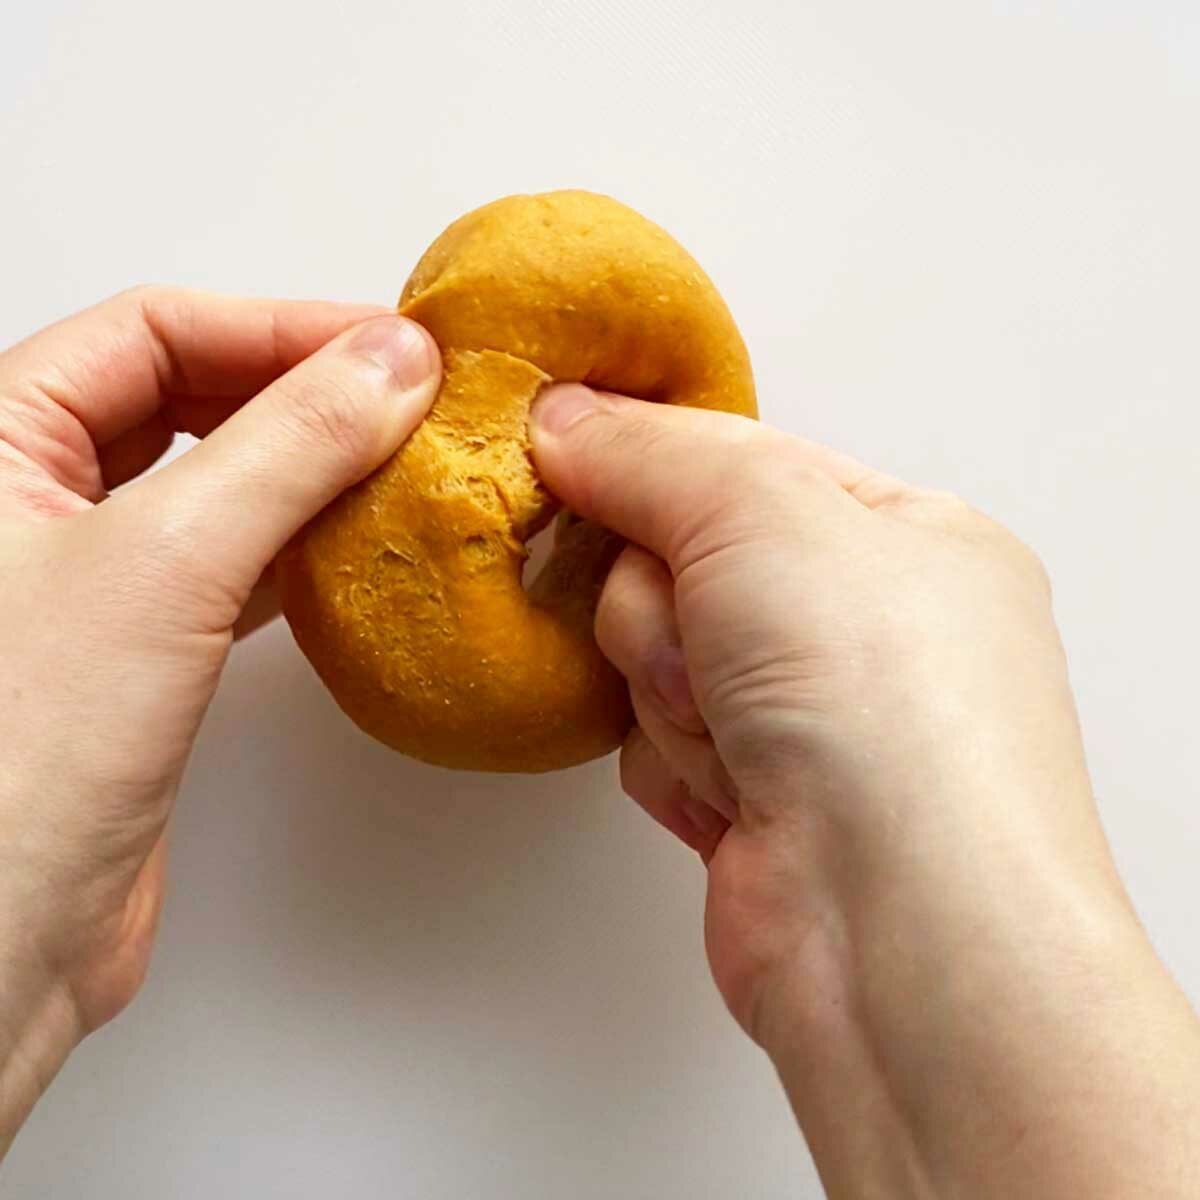
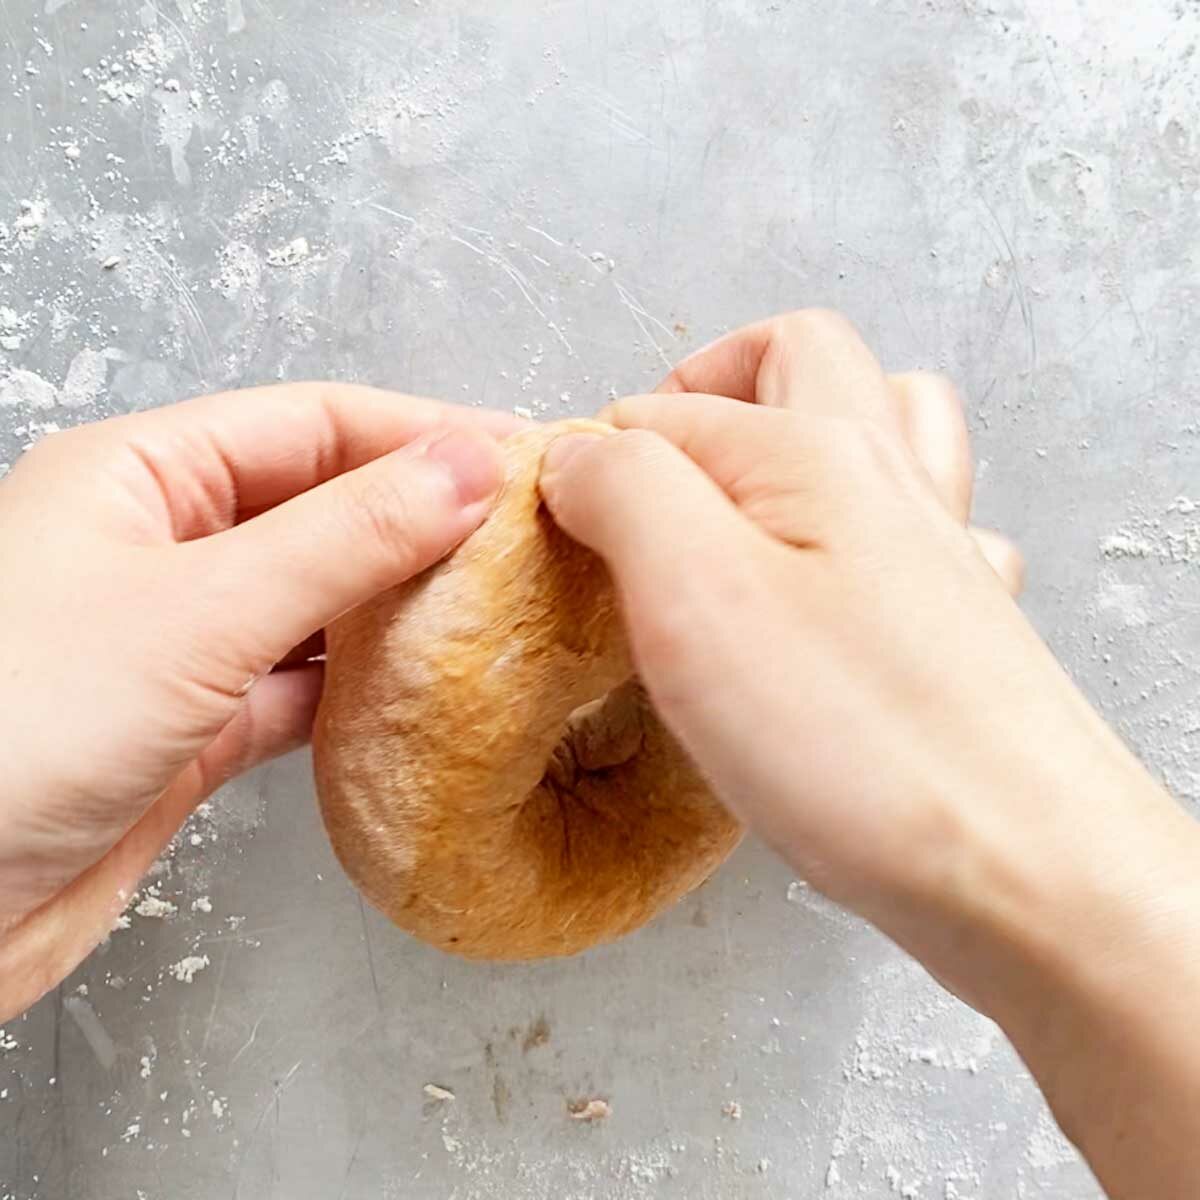
Bring together the two ends of the bagel dough by inserting one end of the rolled dough into the other end
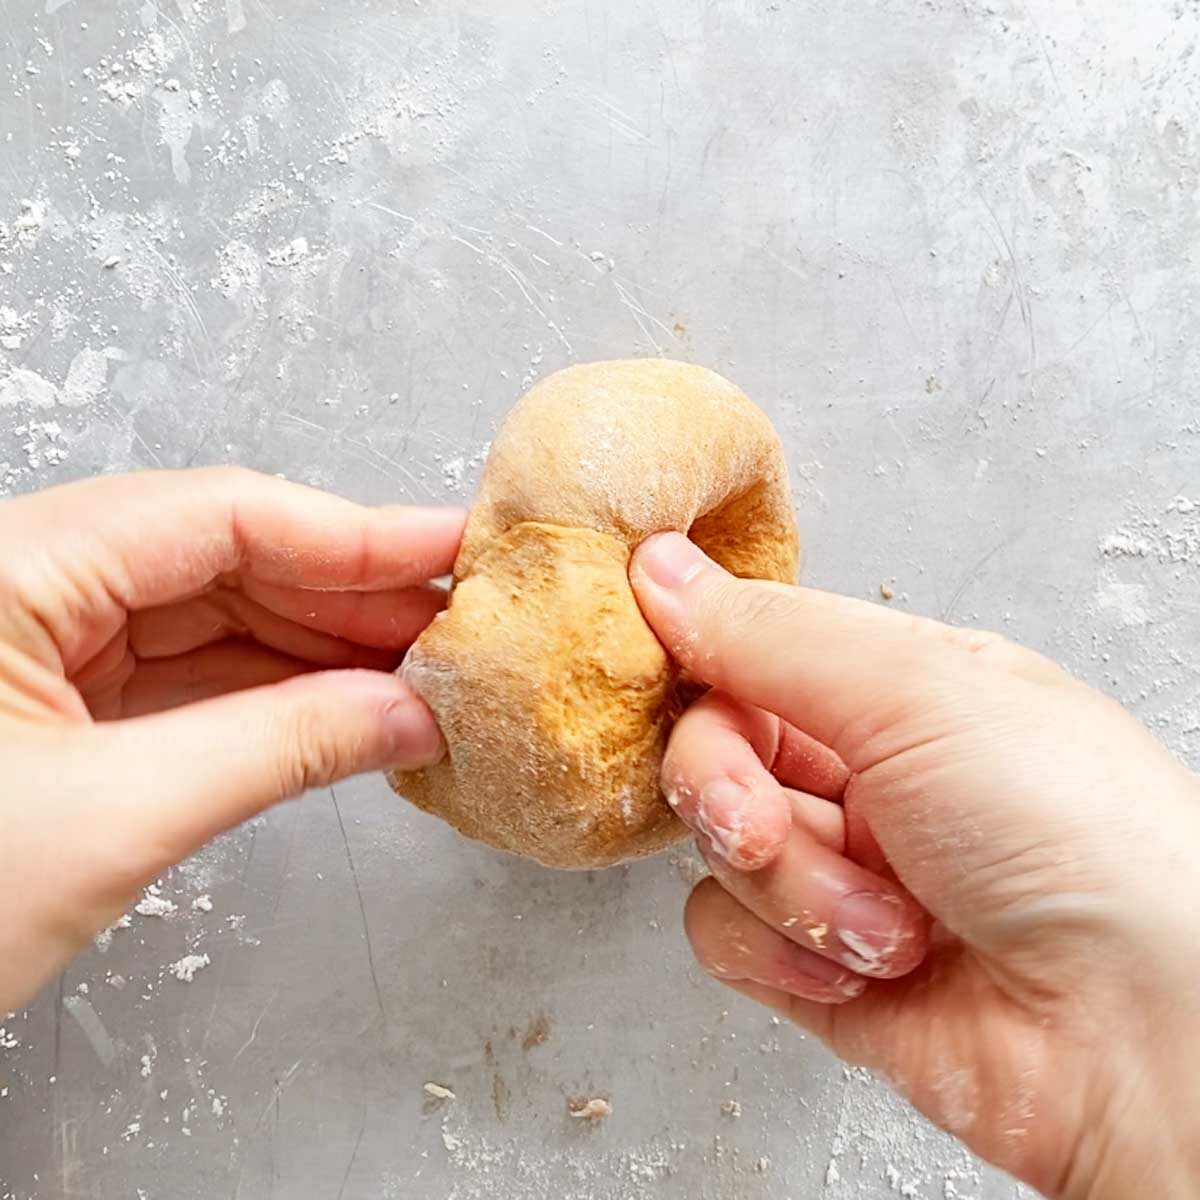
Pinch the seams together so that it won't fall apart during the boiling process.
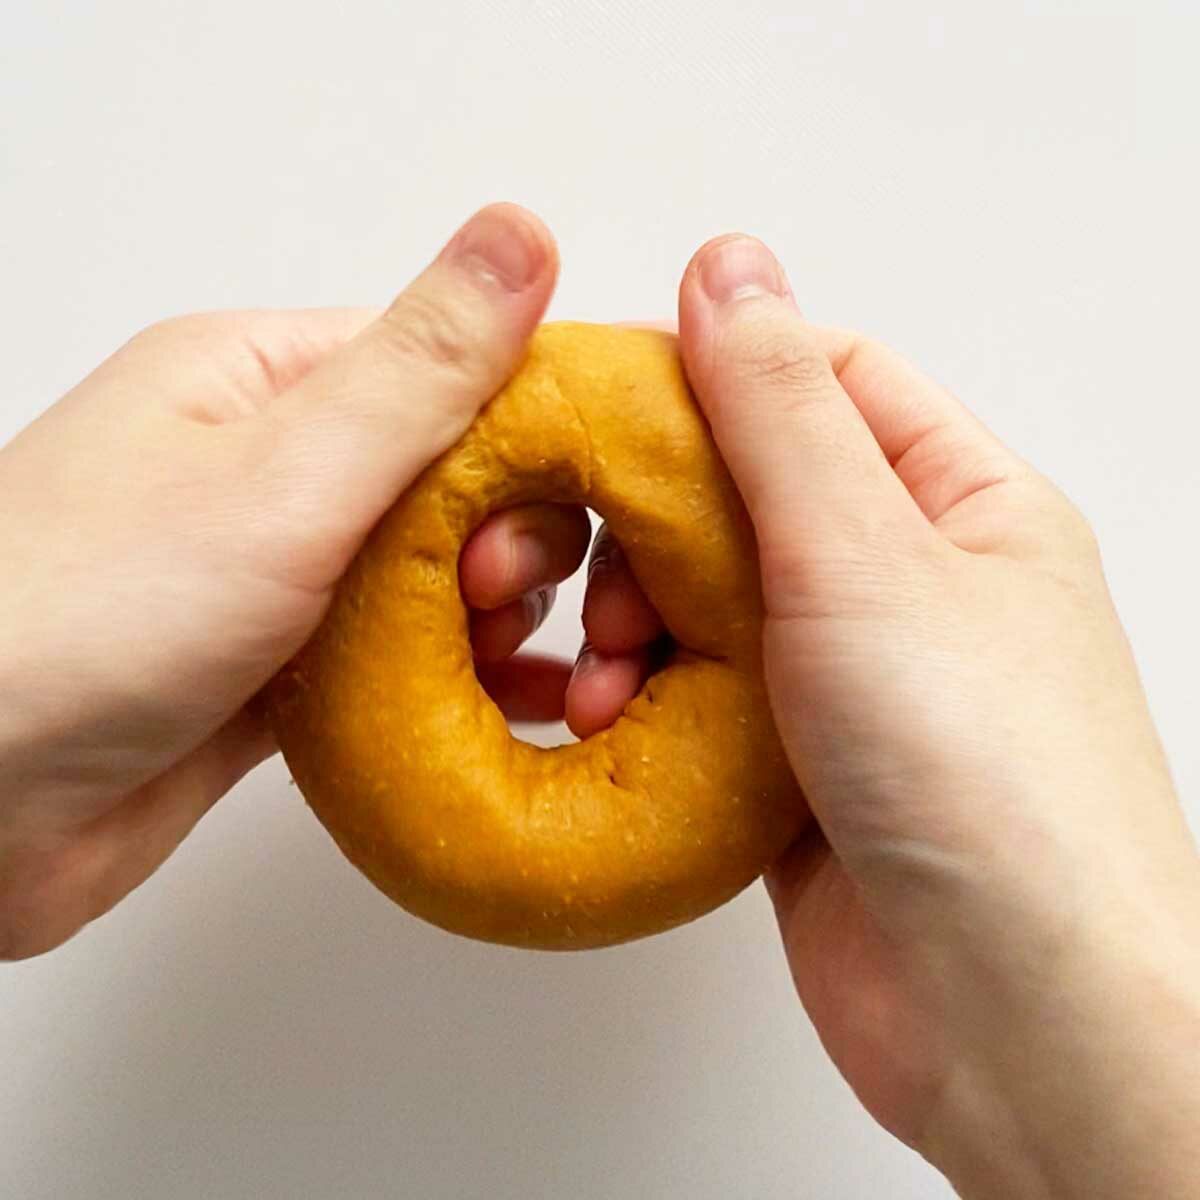
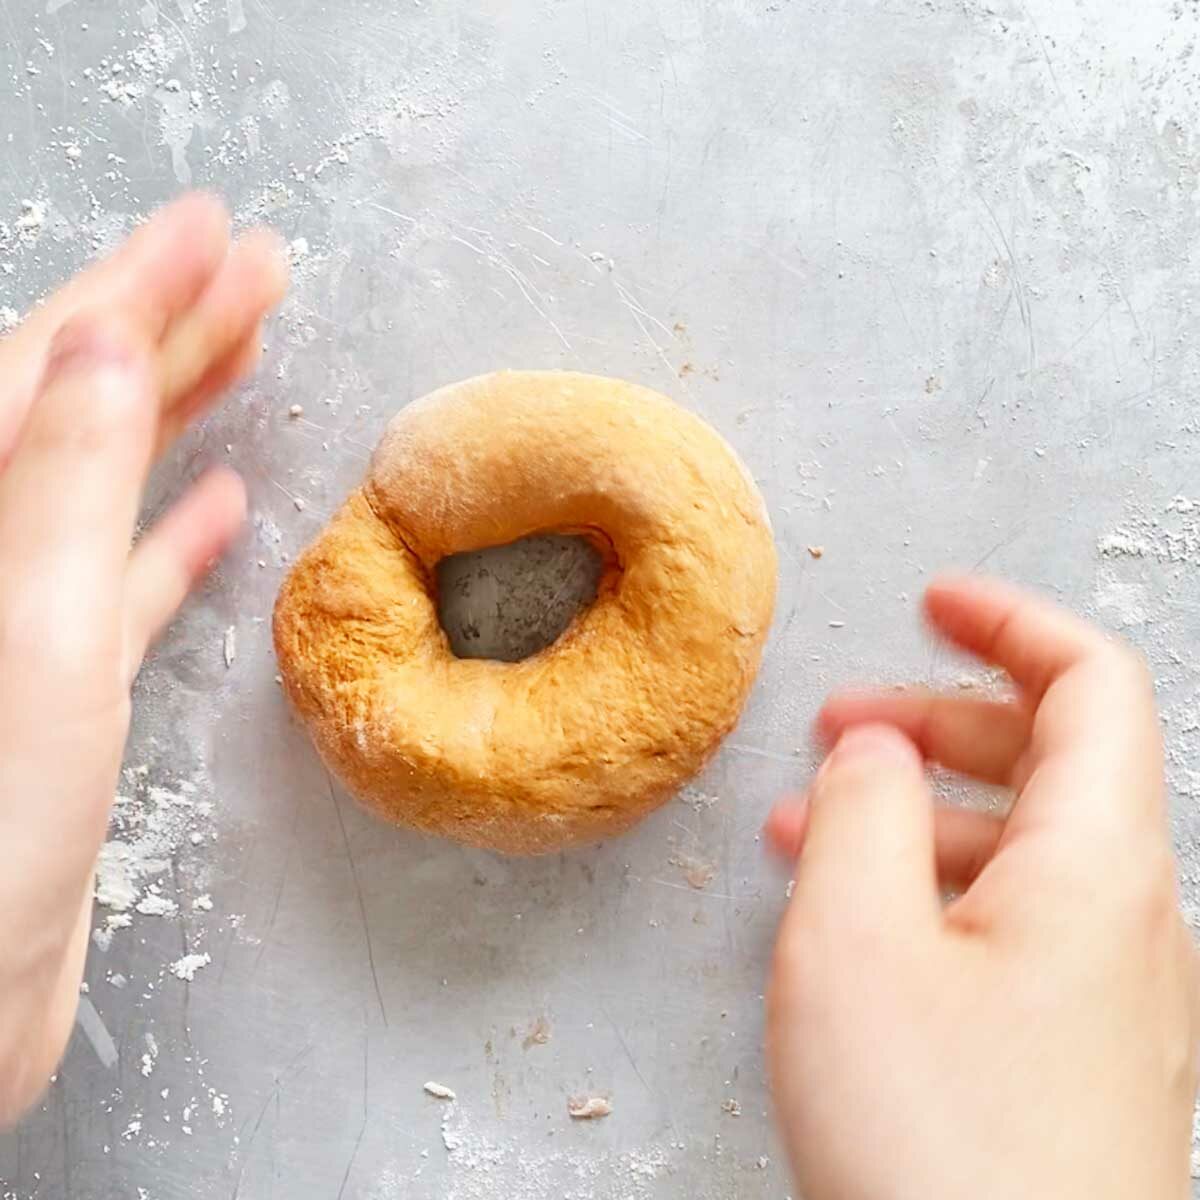
Stretch out the bagel to ensure even thickness
Shape the rest of the bagel dough, then boil and bake the bagels as instructed in the bagel recipe.
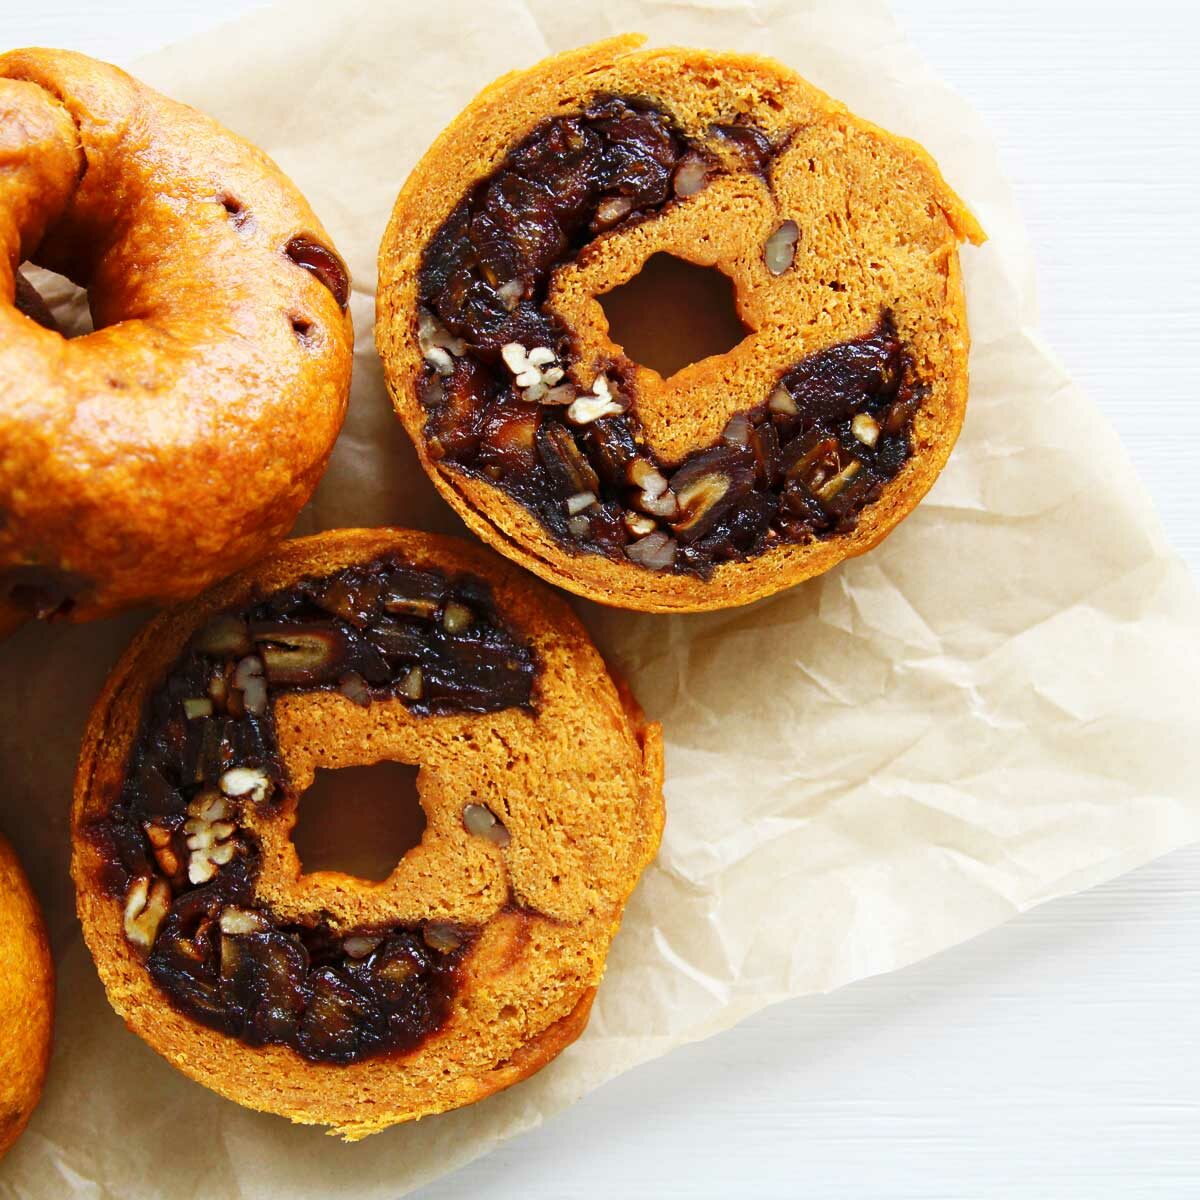
2. Spiral Shaped Filling
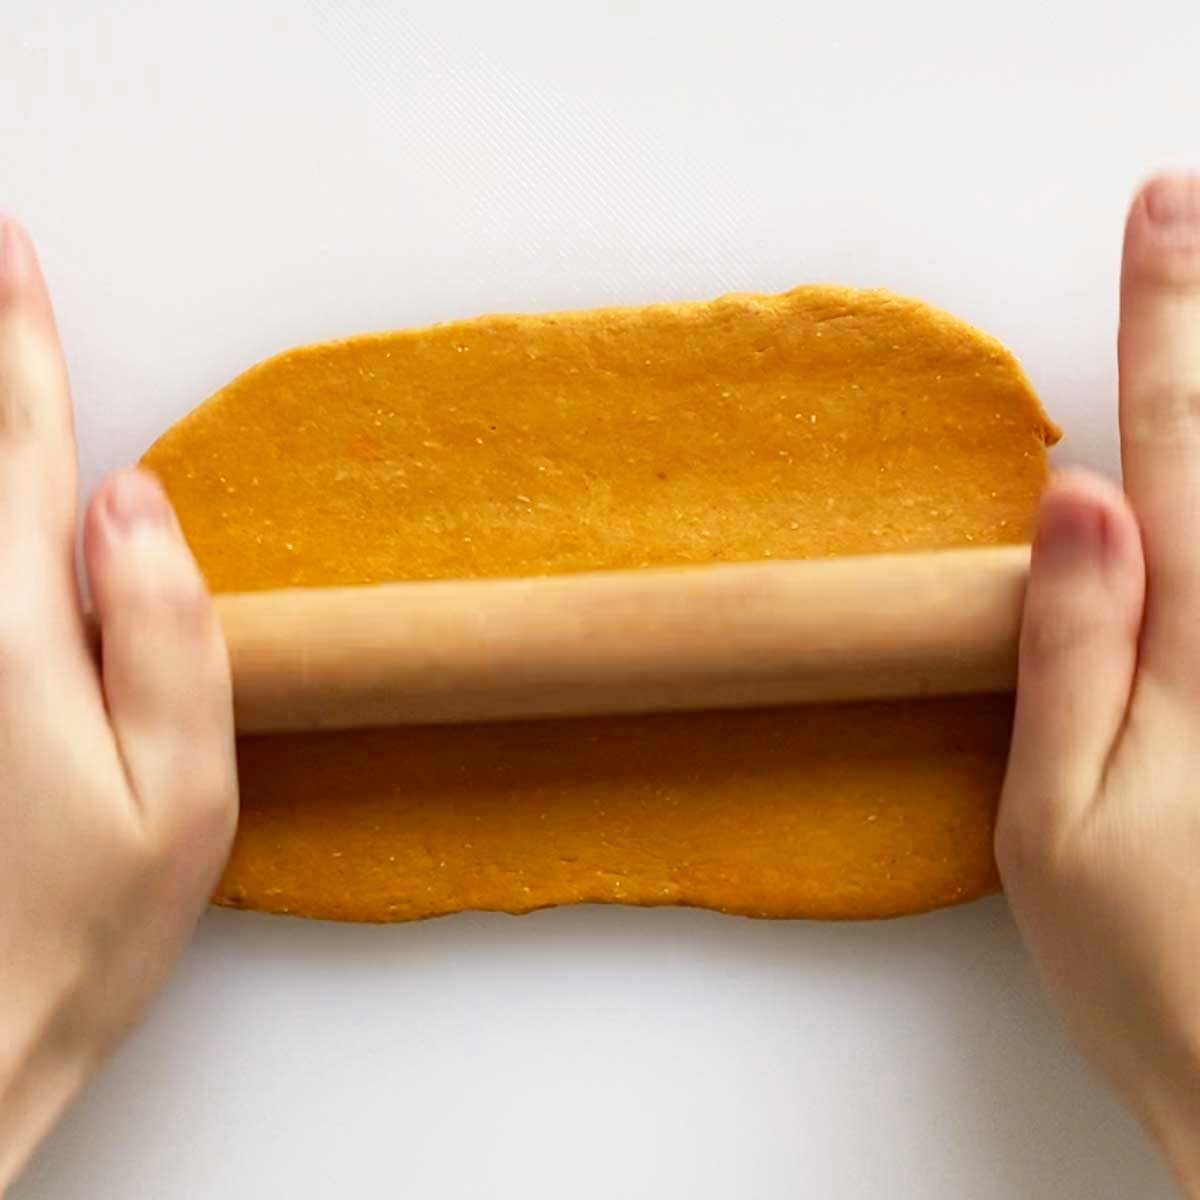
First, prepare the bagel dough of choice, and allow it to go through the first rise. Divide the dough into portions.

Use a rolling pin to roll out each piece of the bagel dough into a thin, 5 x 7 inch rectangle
TIP: the thinner you roll out the dough, the better! This helps to create more layers within the bagel and also helps to seal in the filling since we'll roll the filling inside the flattened dough.
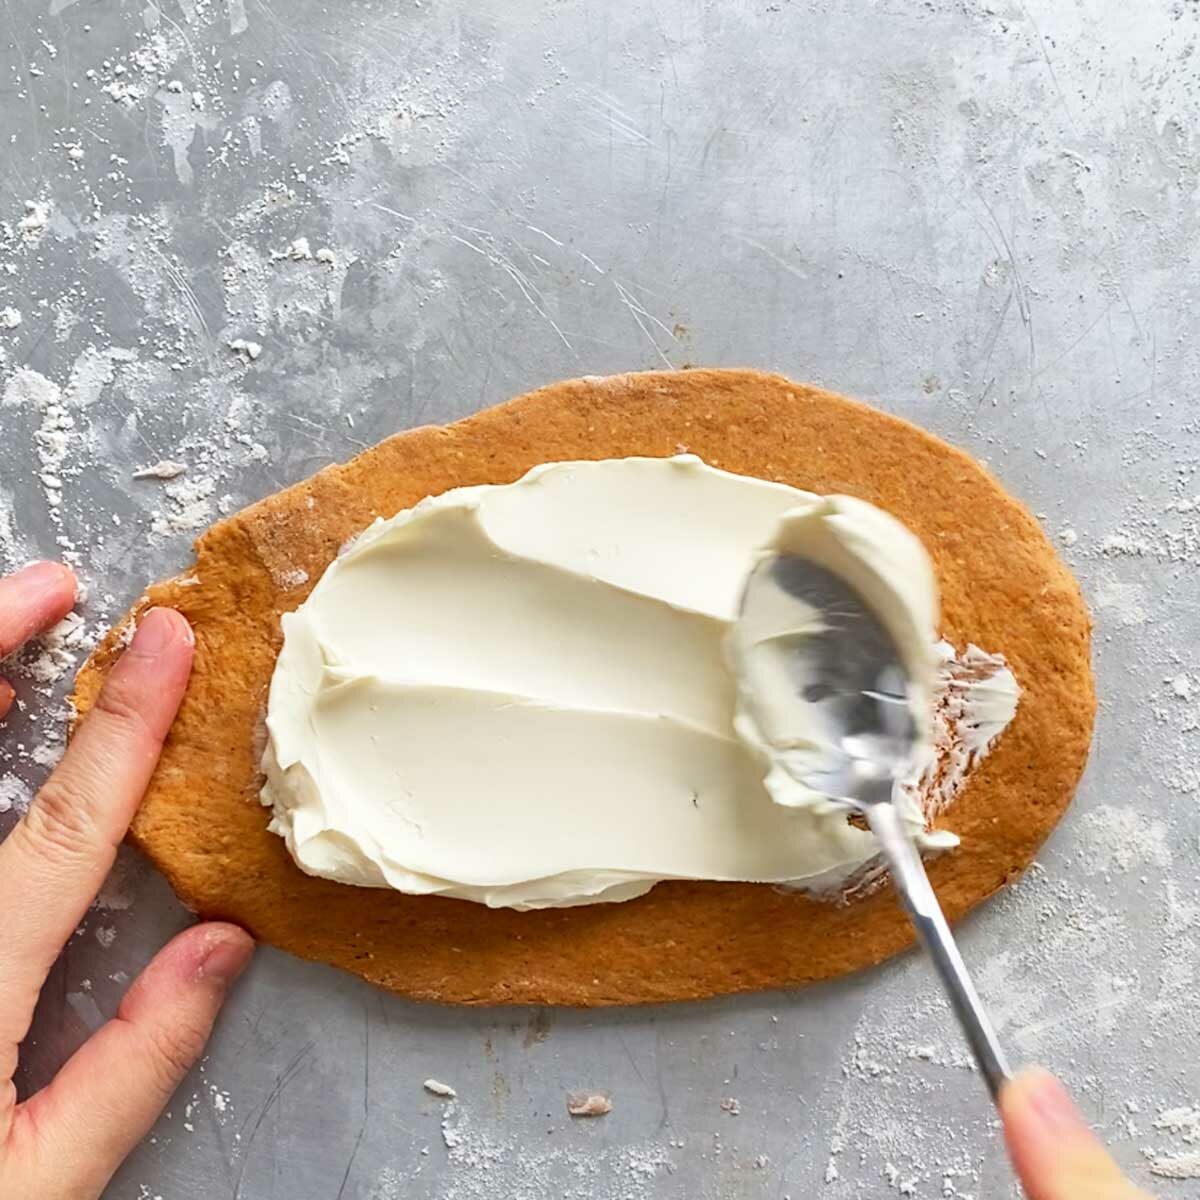
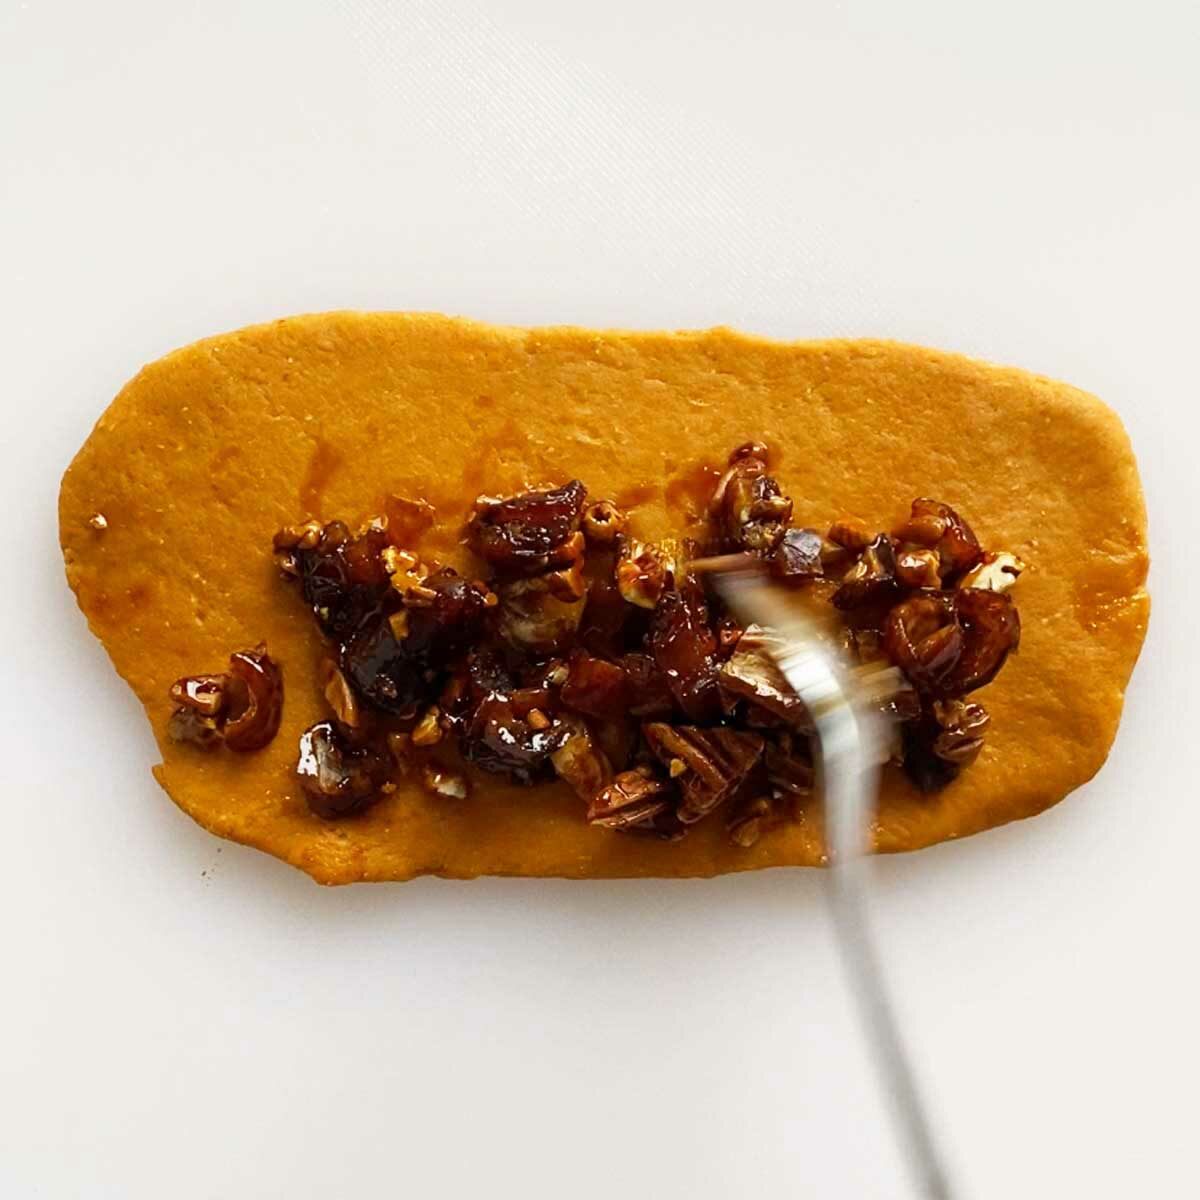
Spoon about 2-3 Tablespoons of the filling onto the bagel dough, spreading the filling onto the dough so that it is evenly distributed.

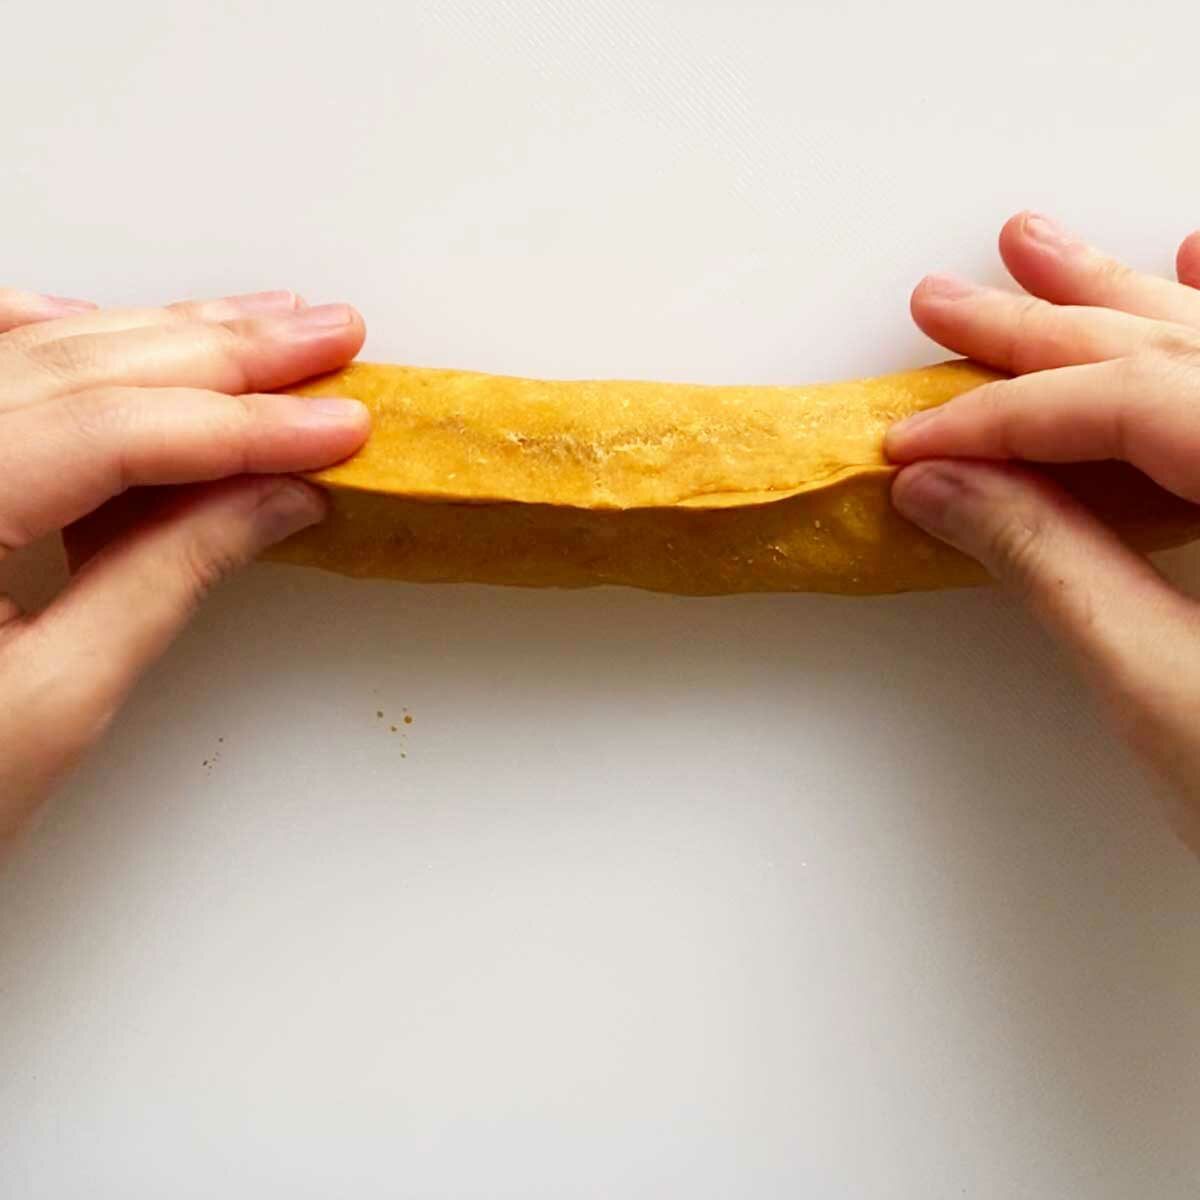
Roll the bagel dough over the filling.
Seal the ends by pinching the seams of the dough with wet fingers.

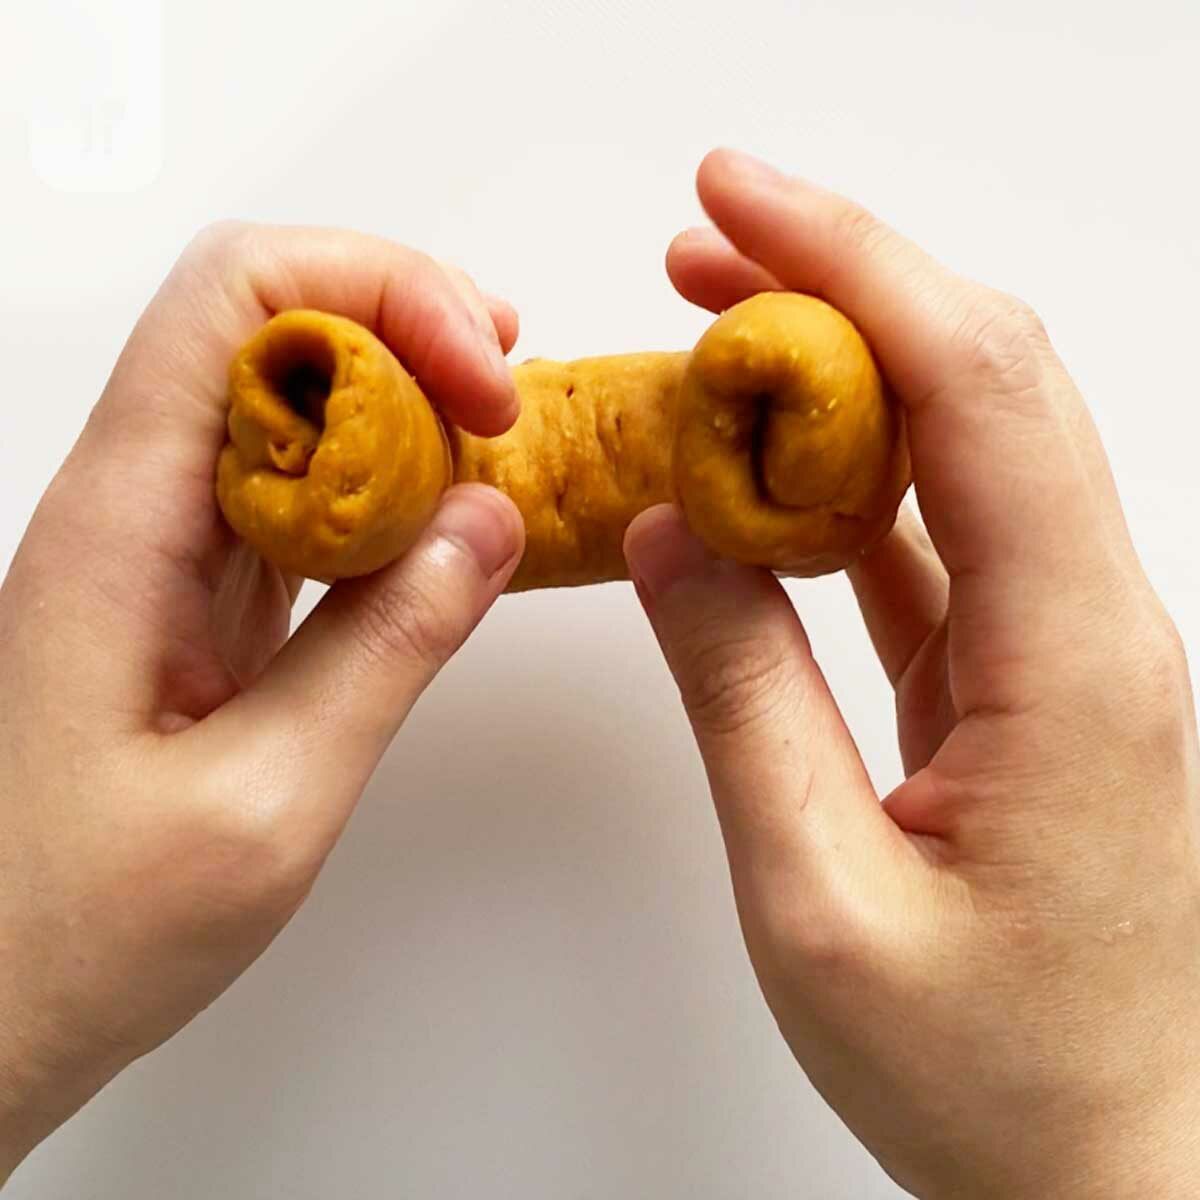
Bring together the two ends of the bagel dough by inserting one end of the rolled dough into the other end.
Pinch the seams together so that it won't fall apart during the boiling process.
Boil and bake the bagels as instructed in the bagel recipe.
Shape the rest of the bagel dough, then boil and bake the bagels as instructed in the bagel recipe.
Conclusion
Hope this step by step guide makes it easier for you to start making stuffed bagels at home! With so many bagel dough flavors and so many filling ideas I promise there's a stuffed bagel recipe for everyone.


Leave a Reply